

Earlier this year we had the opportunity to try out some wonderful À La Carte products from Home School in the Woods which really helped to enhance our study of Ancient Egypt. At that time I discovered that they also carried products that focus on Ancient Greece, which I knew we would be learning about this summer. In fact, I mentioned in my previous review that I had every intention of purchasing at least one of these products. Oh my gosh, you can imagine my excitement when I learned I was chosen to review the Ancient Greece Timeline from the À La Carte Timelines series this time around. The only thing that tempered my excitement was the fact that we were going on vacation during this review period, which limited our time with the product. Thankfully, it was simple enough to double up some days to stay on track.

As with the Ancient Egypt materials, we received the downloadable PDF file that I needed to print out. We were provided with a Family License, meaning it was to be printed out only for use within our family. However, Home School in the Woods does offer Teacher or School Licenses as well. This timeline file opened and printed just fine using Microsoft Edge, though Home School in the Woods does have products that need to be opened in Adobe Reader to be printed properly (such as the Tomb Dash! game we had several months ago).
In addition to the obvious computer and printer with ink, you will need to have some cardstock to print the timeline pages onto. It is recommended to use colored cardstock; however, we use white and then add color by coloring the timeline pieces. Coloring in the pieces is optional according to the instructions, but seeing as we use white cardstock, I definitely insist the children color them brightly to make them look more eye-catching. As the details on the pieces are so small, we have found the best way to color them in is to use colored pencils. Some additional supplies you will need include a hole punch (I love my 3-hole punch), a binder of some kind for the finished product, and I like to store the pages we are working on in a folder to keep things organized.
There are two different ways these timelines can be assembled. If you choose to assemble page-by-page you will not need any additional supplies. However, if you prefer accordion-style as I do, you will need a paper cutter (or scissors) to trim the edges, plus clear packaging tape.
When we used the Ancient Egypt Timeline I printed out the pages and cut them down to size prior to getting started. This time, we completed all the pages prior to cutting them. This was mainly so I could have a few to take with us on vacation, just in case we could get to them (we didn't). I will say, it is probably better to prepare the pages first, as I did find a few snapshot pictures that were over the space where I needed to cut. If I had cut them first, that wouldn't have been an issue, as the children would have known where the border was.
Let's look at this Ancient Greece Timeline in a bit more detail.
This 36-page file consists of license information, instructions & tips, plus the actual timeline pages. There are twelve timeline notebook pages, six pages of snapshot photo images with their captions, plus two pages of extras/momentos. Also included are twelve pages that show what the timeline should look like once it is complete.
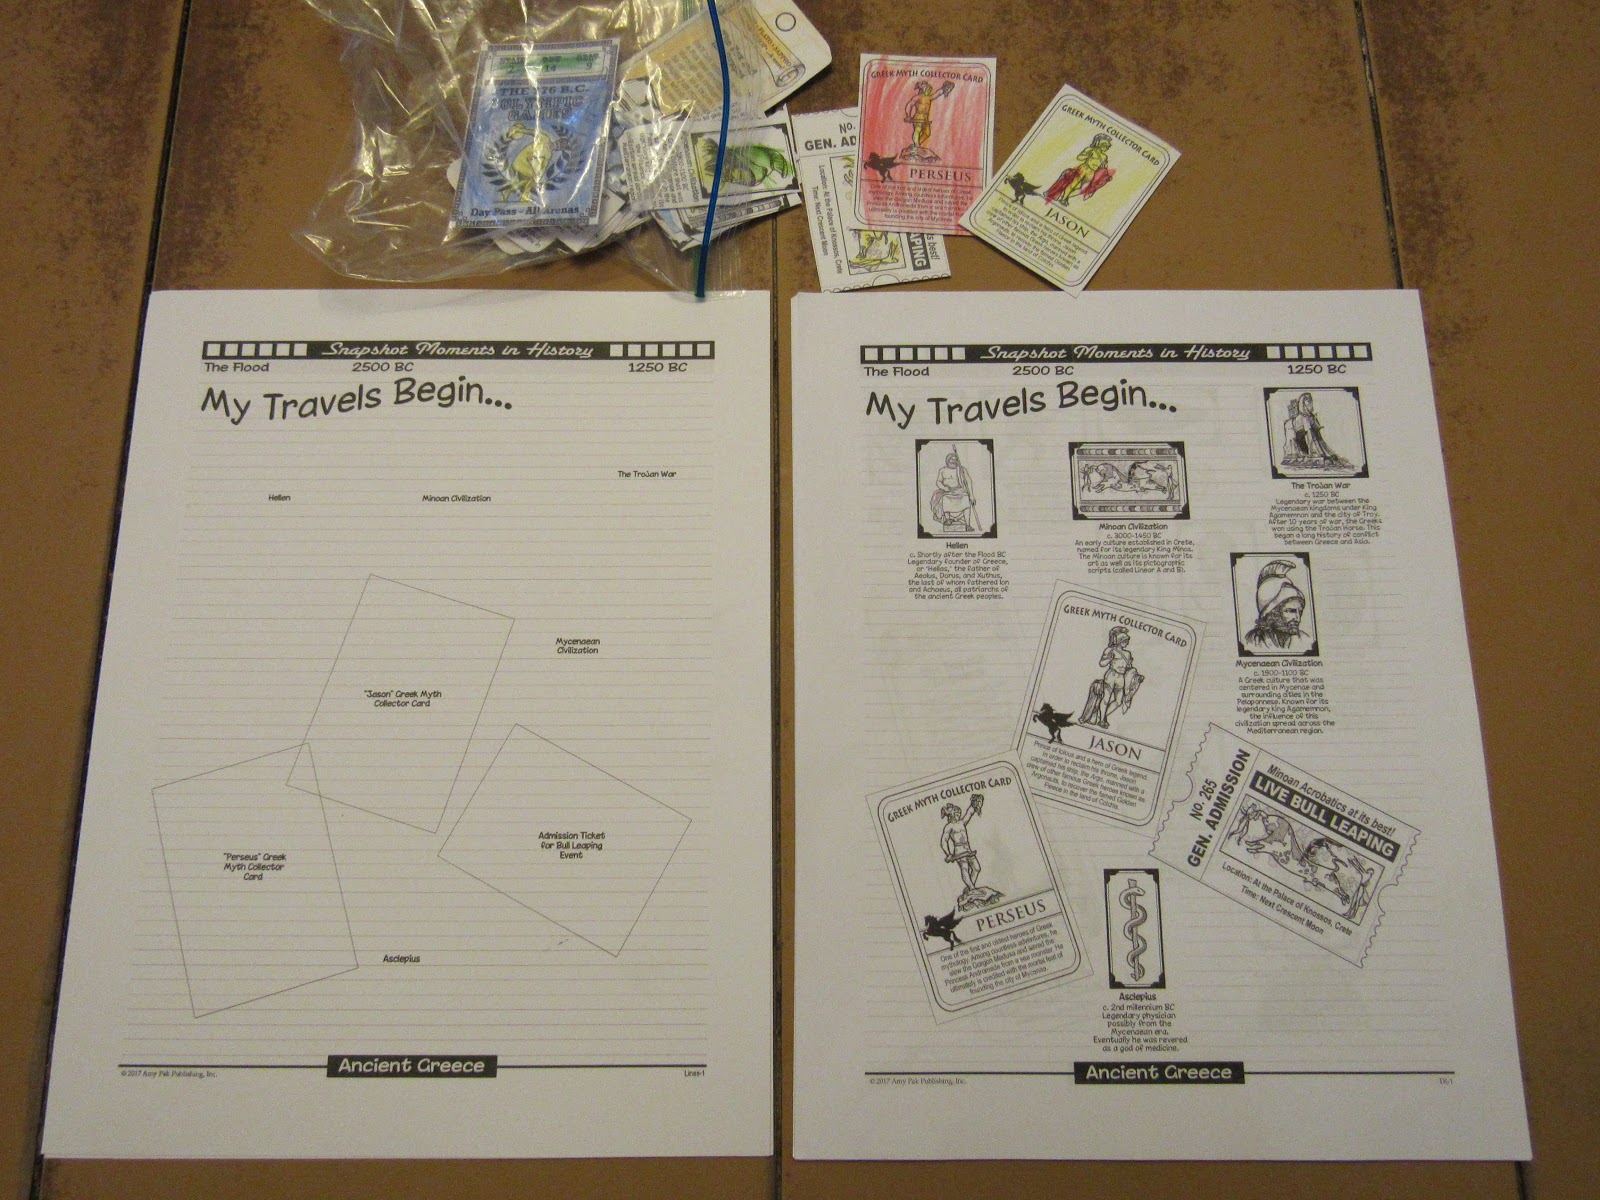
In the photo below, the pages on the left are the blank timeline pages that the children will be gluing the snapshot photo images onto. The pages on the right are teacher keys to help guide us in assembling the notebook. It really does help to have these pages when we are searching for the correct picture. I did want to mention that I used regular printer paper to print the teacher key out. In fact, when we did the Ancient Egypt Timeline, I didn't print them out at all. We just looked at them on the computer. Having done it both ways, it is a little easier to have them printed out, especially if you are going to take them with you when you work on schoolwork at the library as we did a few times this summer.

The timeline begins shortly after the flood with a picture of Hellen, the founder of Greece, and works its way in varying increments through the history of Ancient Greece, with a quick jump at the end to the 1800's where a couple of archaeologists famous for discoveries related to Ancient Greece are placed. Some of the people, places, and events mentioned were familiar to us, but we learned a lot of new information with this timeline. We work our way from the Minoan and Mycenaean civilizations, through the Greek Dark Ages, the Archaic period, the Classical period, the Golden Age of Athens, through to the Fall of Greece.
The timeline is given a more "personal" feel with the inclusion of "momentos" such as Greek Myth Collector Cards, a pass to the first Olympic Games, a bookmark featuring one of Aesop's fables from the Bacchus House of Books, and a Library of Alexandria library card (to name a few).
How did we use the Ancient Greece Timeline?
How did we use the Ancient Greece Timeline?
I worked with all the children at the same time to complete this timeline. Sometimes we worked at the dining table, other times we took it to the library with us for something to do while we waited for summer reading program craft time. We worked on one or two pages at a time. I would read them the title of the caption under the picture they needed to find, then I would describe the picture and read the full description while they searched. They colored, cut, and glued it into the correct spot on their timeline. Those who worked faster got to move ahead while their sibling(s) continued to work. Every once in a while I would review all the pictures they had attached so far (giving the others time to catch up and make sure they had the right pieces).


We made sure to work from left to right, filling in each "column" as we went so we could make sure to be working chronologically.

Harold was able to keep up with the coloring, but he fell behind on the gluing, so I just stored his in a plastic zippy bag until I had a chance to work with him individually.
Once all the pages were complete, I followed the instructions for assembling an accordion-style timeline.

I hole-punched the first page, then trimmed the remaining pages to the correct width before taping them together.

A completed timeline:

Each one will be stored in the child's history binder. Such a wonderful resource for helping us complete our homeschool year, which spanned from the Creation through the Greeks.


These timelines are simple to put together, in fact the older girls can work independently if they choose to. Harold was able to complete his with a lot less help than he needed six months ago. And this also gave the older girls a chance to help their younger siblings, which I feel is so important.
I am very excited to see that there are two timelines we should be able to utilize next year. Home School in the Woods has a timeline for The Middle Ages, and one for The Renaissance and Reformation. I'm feeling a bit giddy right now!!
As you might be able to tell, we really enjoy these "Snapshot Moments in History" timelines. As someone who used to love scrapbooking, I really appreciate the scrapbook feel. I love the detail that is given, including the dates. We learn about so many people, various events (a lot of which I'd never even heard of), battles, leagues, and places. I love that biblical history is included. Not only does the timeline begin by mentioning the flood, but we recognized such names as Darius, Xerxes, and Queen Esther. It was wonderful to be able to place the events from the Bible in context.
All-in-all, this timeline, like the Ancient Egypt Timeline, really did enhance our learning of ancient history. It was a great way for us to review what we had learned, and to learn new information. I do realize the children aren't going to remember all these details, but they have the timelines to flip through whenever they want to. And I loved when they were able to pick out a name or place that they had learned about previously in the year.
I wanted to be sure to tell you some exciting news! The Crew was informed that Home School in the Woods has released their newest product titled Project Passport: Ancient Rome.

This Ancient Greece Timeline is originally a part of one of the (now) five Project Passport products: Project Passport: Ancient Greece. In fact, some of my fellow Crew Mates had the opportunity to review the Project Passport World History Studies materials. Some of the other materials reviewed are: Hands-On History Lap-Paks, Time Travelers American History, Hands-On History Activity-Paks, and Hands-On History Activity Studies.
As you can see, Home School in the Woods has a wide selection of hands-on materials to enhance your history curriculum. Don't forget to click on the banner below to go check out the reviews.


![[PREMIO2009.png]](https://blogger.googleusercontent.com/img/b/R29vZ2xl/AVvXsEjXD_Gx-wZ9EM5hXKrEYLksEBkYfRQtmb8VDVTDG_yyLggQoFIstZsh4zszdG20KqErZicRzEhiNYLty7j3IMXJYsABqkXjr8pp-ncj71xCbpxlXGbGpZq2fTuDQqq1RMKV4DPcDBnBViA/s1600/PREMIO2009.png)


No comments:
Post a Comment
Thank you for visiting my blog today. I love to read your comments, so please leave me one if you have the time.
Blessings