Showing posts with label art. Show all posts

Wednesday, May 13, 2020

Enjoying Art Lessons with Beyond the Stick Figure {A Homeschool Review Crew Review}

Disclaimer: I received a FREE copy of this product through the HOMESCHOOL REVIEW CREW in exchange for my honest review. I was not required to write a positive review nor was I compensated in any other way.


My children and I have been enjoying art lessons from Beyond the Stick Figure Art School. The instructor, Sally, has a degree in art from Loughborough College of Art and Design in England. Since then she has moved to America and now homeschools her eight children. She wanted to be able to pass on her art skills, and one way she has done that is by sharing them in this art program. We are reviewing the Beyond the Stick Figure Complete Drawing Course PLUS 3 Bonus Courses. 


We have actually been given a lifetime membership to this program. Most of the courses have three parts, though the Pen & Ink course has only two. Each part is then divided into numerous topics or steps or days (take your pick, she actually calls them all three on the site). The Drawing course has a total of 55 topics, Pen & Ink has a total of 15, Watercolor has a total of 52, Acrylic has a total of 24, and 3D Design has a total of 30. 

When you log into your account you will see a bar that shows your progress, and then below that you will see the course you are signed up in, plus a link to click to look at the materials needed. There is quite the list of materials needed for all of these courses combined. Thankfully we were able to start with just a sketchbook and PrismaColor markers in the Drawing Course. She was quite particular on which materials to purchase, which I can understand the thought process behind needing quality art supplies. 


The lessons build upon one another, so you are not able to move to the next one until the current one has been marked complete. Personally, I would have loved to have been able to have moved between the different courses without having to complete the previous one. Thankfully we were able to mark them complete without actually watching the video, so I could move ahead to check out all the courses. Though, I did feel like I was cheating a bit, and it was a bit time consuming waiting for each to load before being able to mark it complete. 

The majority of the review period was spent in Drawing Part 1 and a little of Drawing Part 2. Then we sort of skipped to Pen & Ink because the children wanted to try something different. 

I appreciated that Sally decided to start by teaching the students to see like an artist, and to look for circles, dots, curved lines, and straight lines in the world around them. This seemed to match well with the sample video that is available on the site, where you get to use those different shapes to create a picture. (I won't tell you what it is, as I don't want to spoil it for you, but you can watch that video and try it out right on the main page without having to join.) 

Sally described circles, dots, curved lines, and straight lines to us.


For the first week using the program, Harold and Hannah explored the house and yard, going on a little scavenger hunt each day, looking for those parts that make up everything we see. There were worksheet pages we had to download where they could define and practice each, and then draw their own masterpiece using that specific shape. For example, here is Hannah's Circle Creation.


The next week was spent taking our knowledge of circles, dots, curved lines, and straight lines a bit further. Plus, we were able to work with the markers we had purchased for the course. So far this has been my favorite part of the course because I got to doodle. 

The instructor showed us what it was she wanted us to do.


And then we got to drawing and coloring. 

Here are my circle, dot, and curved line doodles:


These are Hannah's circles, dots, curved lines, and straight lines.


We then had 4 projects to complete that combined the different shapes.

Project #1: We were to draw 3 circles, 5 dots, and color any way we wanted to
Project #2: We were to draw curved lines all over the page, letting them overlap. We weren't to take our marker off the paper. Then we were to color it.
Project #3: We were to cover the page with circles, turning some into dots, and then draw curved lines. Again we were to color them how we desired.
Project #4: We were to start at one end of the paper, draw a small line, let the marker sit to form a dot, then go in a different direction, and repeat til we hit the end of the paper. Then we were to do it again and again, overlapping the lines.

Here's a look at mine:


 And here are Hannah's:

Harold used smaller paper so he was able to fit a bunch of his on one page.


I definitely appreciated that Sally gave us the option to use the size paper we were comfortable with. Harold didn't want to make his pictures very big, so he just used the 1/8 of a page size. I prefered using paper the size of 1/4 of a regular size sheet of printing paper. And Hannah used both sizes.

Drawing Part 1 finishes off with some lessons on primary/secondary colors and overlapping. 


In Drawing Part 2, Sally had us practicing little details over and over again in a grid. First we were to trace, then we were to follow dots, and then we were to draw them without any guidance. As we couldn't find any blank grids, I just had the children practice tracing and following the dots. 


Sadly, the children were not fond of these lessons, and neither was I honestly. As I had looked ahead to become knowledgeable of the different courses for this review, I realized the entire month of lessons was going to be repeating different lines and curves over and over. After several days of the children struggling with trying to follow the dots, I decided to move on to the Pen & Ink section. 

I am thankful that I did, because they had a lot more fun and I even got Tabitha to try it out. She is quite the artist, and wasn't interested in trying out the beginning lessons, but when she saw that watercolors were involved, her interest was piqued. 

I did notice that the Pen & Ink course seemed to go hand-in-hand with the Watercolor course, seeing as watercolors are used for the two Pen & Ink lessons. 

The first was a tiny 3"x2 1/4" project. The art itself was contained to a 1 inch square, while the rest was a frame. 


The other lesson in Pen & Ink teaches us to make a transfer by first drawing it on tracing paper, flipping it to the reverse side and tracing it again in pencil, and then transferring it to the watercolor paper and tracing it again with the Sharpie marker. 


I know Hannah is really looking forward to continuing on with the Watercolor course. Harold is greatly anticipating moving on to the the 3D Design, especially because our clay and other supplies arrived the other day. 

Though we weren't a fan of Drawing Part 2, we have really been enjoying the rest of this art course. I do wish she could make it so you could go to the other courses without first having to work through the others. I would also love to see more drawing lessons that were more like the sample on her site. We had spent a lot of time focusing on circles, dots, curved lines, and straight lines, and I would have loved to have incorporated that more. 

You can find Beyond the Stick Figure on Facebook, Instagram, Pinterest, and YouTube.

Don't forget to see what my fellow Crew Mates tught about Beyond the Stick Figure Art School by clicking on the banner below.


Beyond the Stick Figure Complete Drawing Course {Beyond the Stick Figure Art School}

Wednesday, October 23, 2019

Creating Works of Art with Creating a Masterpiece {A Homeschool Review Crew Review}


Tabitha is quite the artist, and I thought she would appreciate the chance to try out an actual art program this year. When I learned that Creating a Masterpiece was coming up for review, I was hesitant at first. I had wanted to try this program out in the past, but we couldn't afford the art materials that were required. I understand that quality supplies are essential, but, they weren't something we could justify purchasing. So, I have to say, I was thrilled when I learned we were going to be reviewing the Drawing Program, because it doesn't have near as many required supplies. And thankfully, Tabitha already had a set of quality colored pencils, so we didn't have to purchase too many supplies to use this program. 


We received a one-year subscription to the online Drawing Program which includes four levels: Beginning Drawing plus Levels 1-3. The Beginning Drawing level that we were working in has eight different projects. The number of projects in the other levels ranges from 6-8. There are a total of 30 projects and 48 lessons.

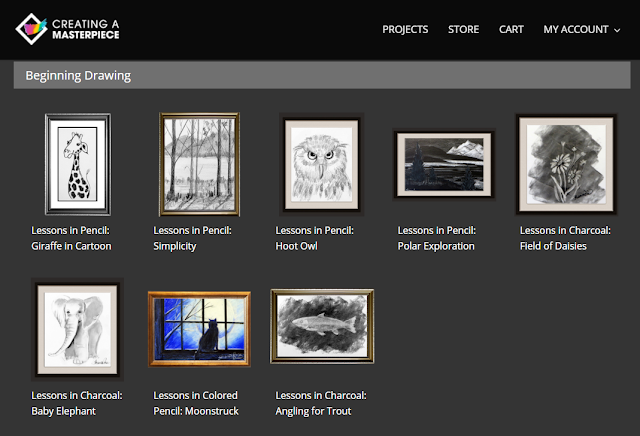
Here are the lessons from the Beginning Drawing level:


When I was first perusing the site and trying to figure out which supplies we would need to purchase, I tried to focus on the simplest projects so we wouldn't have to spend too much money right away. I figured if Tabitha was really enjoying the program, we could purchase additional materials at a later date. So, I was gravitating to what I assumed would be the simplest lessons, such as the Giraffe in Cartoon and the Hoot Owl. Tabitha was very interested in doing the Field of Daisies though, so I decided we could also purchase some charcoal. I think what threw me the most was that there were so many different types of paper that needed to be purchased. I learned that there are reasons for the different types of quality paper. 

So, we purchased the needed materials. I love that the instructor, Sharon Hofer, includes not just a supply list, but a link to the supplies at the site she recommends purchasing from. Granted, you aren't required to purchase from them, but it sure made things simpler.

Here's what we ended up buying.


And then we were ready to get started.

To go to a lesson, we just needed to click on the image of the project or the title from the "Beginning Drawing Level" page pictured above. From there we are directed to the informational page for the project. 


Clicking on supply list will show you what you need, along with a nifty chart that shows how the needs change with multiple children.


Once you have all your supplies lined up, you can click on the lesson link at the bottom of the informational page. Here you will find the following:
  • Lesson Videos
  • Project Supplies and Downloads
  • Supplies Used in this Lesson
  • Helpful Tips
  • Project Images
  • Lesson Highlights
  • Student Showcase

Let's take a look at the Lesson Videos, the main part we focused on. 

The number of sections varies with the different lessons. For example, the Giraffe in Cartoon only has four sections, but Moonstruck (the project Tabitha started with) has six. 


The first video is an introduction to the project and then the remainder are step-by-step lessons with Sharon Hofer teaching. We either see her talking to us, or see her working on her project from above, sort of like we are looking over her shoulder.

She starts out the lesson by introducing herself and the inspiration for the project. Then she lets you know what supplies to use, explaining specific details, like why she uses a specific paper or why she uses a specific size. For example, for the drawing she recommends using a smaller sheet as it is easier.


Here she was sharing a picture of their kitty, the inspiration for the Moonstruck picture.


She then takes us through the project, step-by-step, helping the viewer to make note of details, such as the shapes that are being used.

Here she has worked on drawing the window and moon.


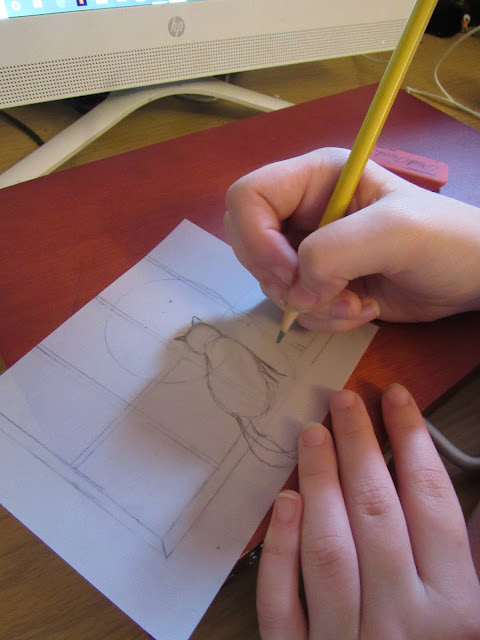
Then she moved on to the cat. Here we had to pay attention to the egg-shaped body, the circular head and the rectangular leg. 


Here's Tabitha working on hers.


Through each 5-10 minute video, the student follows along, sometimes pausing the video to be able to catch up. With Moonstruck, branches were added, then we start coloring in the different sections, creating darker and lighter areas by shading. She also had us using an eraser to make sections almost white again.

Yes, I said we. Though Tabitha was the first one to work on this project, Hannah and I worked on it during our mommy-time. Here are our results. 

Tabitha chose to draw her picture twice. Once on the recommended paper and another time in her sketchbook. She actually prefers the way it turned out in her sketchbook (the bottom drawing).


Hannah and I enjoyed working together.


I also spent some mommy-time working with Harold on a drawing. He wanted to make the Giraffe in Cartoon. 


Miss Sharon showed us the real-life picture of the giraffe that inspired this project.


She explained how we were going to be exaggerating features to make the giraffe more cartoony.

Harold might have gotten a little carried away with the length of the neck.


He was quite pleased with his drawing.


I think both of ours came out very nicely actually.


The thing is, this was actually our second attempt. Harold wasn't that happy with his first drawing, so I agreed to do it again.

I can't tell which one of mine I like best.


But I do know that it was a lot of fun to do, and it was a great way to get some one-on-one time.

I also love that Harold was inspired to try his hand at making a dog picture he found into a cartoon.

So, as you can see, even though I asked to review this program with Tabitha in mind, she wasn't the only one using it. In fact, I even got Amelia to try it out. Tabitha and Amelia decided to work on Simplicity. I think they both came out very nicely.


I love how each person is able to have their own style come through, even while following a step-by-step lesson. 

Of course, I did mention that Tabitha had wanted to do the Field of Daisies, which is why I purchased charcoal. And yes, yes she did. In fact, she drew two masterpieces, again using two types of paper. 


The one problem we had with this project is that the charcoal kept rubbing off because we didn't have anything to seal it with. Though she mentions using a sealant in the video, it wasn't listed on the supply list, or we would have gotten some before starting. I think that is one thing I wish she would change. It would be awesome if everything needed was actually on the list. I realize it isn't a huge issue, and really that is the only time we've noticed this so far. 

The other thing some of the children and I had an issue with was when she would draw a section, and then decide she wanted to move it over a bit or change the shape. I understand that she is showing the flexibility of drawing, and how easy it was to erase, especially when we were working on the vellum paper. However, I am not one who likes to do a lot of erasing even then. So, I did keep my picture the way I originally drew it, and was quite happy with it.

We are enjoying these art lessons very much and are very thankful we were able to review the Drawing Program from Creating a Masterpiece. Miss Sharon is very easy to follow, and she explains what she is doing at each step in a very understandable manner. So, even though I originally thought it was Tabitha who was going to be using the program, I was pleased to see that even the younger children were able to join in. In our family, the art students ranged in age from 7 to 40-something. So, I would have to say, this is appropriate for a wide range of people. Even Amelia, who always complains that she can't draw, did a wonderful job on simplicity.

 I'm so glad we have a year to work our way through all four levels of the program. I'm sure our art skills are all going to improve.

You can find Creating a Masterpiece on Facebook.

Don't forget to click on the banner below to see what my fellow Crew Mates thought of this art program.


Learning to Draw {Creating a Masterpiece Reviews}
Crew Disclaimer

Wednesday, October 2, 2019

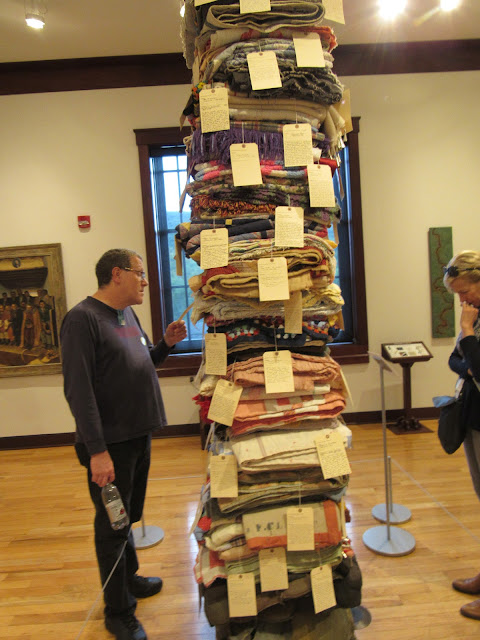
Wordless Wednesday: October 2, 2019 (w/linky) - Field Trip Part 2: The Rockwell Museum

It's been a couple of weeks since we went to the Corning Museum of Glass and the Rockwell Museum. I was supposed to share our time at the Rockwell Museum last week, but I ran out of time. If you missed the pictures from the Corning Museum of Glass, you can find them here.

We decided to purchase the combo ticket that allowed us to also go to the Rockwell Museum. We took the little bus they have that goes from the Corning Museum of Glass to the Rockwell Museum, then back to the parking lot.


They have a scavenger hunt for the children to do, where they have to identify the works of art that are each represented by a small section.


Looking forward to seeing your Wordless (or not so wordless) Wednesday posts this week.

No button currently, and there won't be one until I can figure it out seeing as Photobucket has changed things. Feel free to still share the picture in place of the button on your Wordless Wednesday post or in a list of Wordless Wednesday linkies. Just link it to my Wordless Wednesday permalink please.


Related Posts with Thumbnails
 
BlogNation.com