Showing posts with label painting. Show all posts

Wednesday, May 13, 2020

Enjoying Art Lessons with Beyond the Stick Figure {A Homeschool Review Crew Review}

Disclaimer: I received a FREE copy of this product through the HOMESCHOOL REVIEW CREW in exchange for my honest review. I was not required to write a positive review nor was I compensated in any other way.


My children and I have been enjoying art lessons from Beyond the Stick Figure Art School. The instructor, Sally, has a degree in art from Loughborough College of Art and Design in England. Since then she has moved to America and now homeschools her eight children. She wanted to be able to pass on her art skills, and one way she has done that is by sharing them in this art program. We are reviewing the Beyond the Stick Figure Complete Drawing Course PLUS 3 Bonus Courses. 


We have actually been given a lifetime membership to this program. Most of the courses have three parts, though the Pen & Ink course has only two. Each part is then divided into numerous topics or steps or days (take your pick, she actually calls them all three on the site). The Drawing course has a total of 55 topics, Pen & Ink has a total of 15, Watercolor has a total of 52, Acrylic has a total of 24, and 3D Design has a total of 30. 

When you log into your account you will see a bar that shows your progress, and then below that you will see the course you are signed up in, plus a link to click to look at the materials needed. There is quite the list of materials needed for all of these courses combined. Thankfully we were able to start with just a sketchbook and PrismaColor markers in the Drawing Course. She was quite particular on which materials to purchase, which I can understand the thought process behind needing quality art supplies. 


The lessons build upon one another, so you are not able to move to the next one until the current one has been marked complete. Personally, I would have loved to have been able to have moved between the different courses without having to complete the previous one. Thankfully we were able to mark them complete without actually watching the video, so I could move ahead to check out all the courses. Though, I did feel like I was cheating a bit, and it was a bit time consuming waiting for each to load before being able to mark it complete. 

The majority of the review period was spent in Drawing Part 1 and a little of Drawing Part 2. Then we sort of skipped to Pen & Ink because the children wanted to try something different. 

I appreciated that Sally decided to start by teaching the students to see like an artist, and to look for circles, dots, curved lines, and straight lines in the world around them. This seemed to match well with the sample video that is available on the site, where you get to use those different shapes to create a picture. (I won't tell you what it is, as I don't want to spoil it for you, but you can watch that video and try it out right on the main page without having to join.) 

Sally described circles, dots, curved lines, and straight lines to us.


For the first week using the program, Harold and Hannah explored the house and yard, going on a little scavenger hunt each day, looking for those parts that make up everything we see. There were worksheet pages we had to download where they could define and practice each, and then draw their own masterpiece using that specific shape. For example, here is Hannah's Circle Creation.


The next week was spent taking our knowledge of circles, dots, curved lines, and straight lines a bit further. Plus, we were able to work with the markers we had purchased for the course. So far this has been my favorite part of the course because I got to doodle. 

The instructor showed us what it was she wanted us to do.


And then we got to drawing and coloring. 

Here are my circle, dot, and curved line doodles:


These are Hannah's circles, dots, curved lines, and straight lines.


We then had 4 projects to complete that combined the different shapes.

Project #1: We were to draw 3 circles, 5 dots, and color any way we wanted to
Project #2: We were to draw curved lines all over the page, letting them overlap. We weren't to take our marker off the paper. Then we were to color it.
Project #3: We were to cover the page with circles, turning some into dots, and then draw curved lines. Again we were to color them how we desired.
Project #4: We were to start at one end of the paper, draw a small line, let the marker sit to form a dot, then go in a different direction, and repeat til we hit the end of the paper. Then we were to do it again and again, overlapping the lines.

Here's a look at mine:


 And here are Hannah's:

Harold used smaller paper so he was able to fit a bunch of his on one page.


I definitely appreciated that Sally gave us the option to use the size paper we were comfortable with. Harold didn't want to make his pictures very big, so he just used the 1/8 of a page size. I prefered using paper the size of 1/4 of a regular size sheet of printing paper. And Hannah used both sizes.

Drawing Part 1 finishes off with some lessons on primary/secondary colors and overlapping. 


In Drawing Part 2, Sally had us practicing little details over and over again in a grid. First we were to trace, then we were to follow dots, and then we were to draw them without any guidance. As we couldn't find any blank grids, I just had the children practice tracing and following the dots. 


Sadly, the children were not fond of these lessons, and neither was I honestly. As I had looked ahead to become knowledgeable of the different courses for this review, I realized the entire month of lessons was going to be repeating different lines and curves over and over. After several days of the children struggling with trying to follow the dots, I decided to move on to the Pen & Ink section. 

I am thankful that I did, because they had a lot more fun and I even got Tabitha to try it out. She is quite the artist, and wasn't interested in trying out the beginning lessons, but when she saw that watercolors were involved, her interest was piqued. 

I did notice that the Pen & Ink course seemed to go hand-in-hand with the Watercolor course, seeing as watercolors are used for the two Pen & Ink lessons. 

The first was a tiny 3"x2 1/4" project. The art itself was contained to a 1 inch square, while the rest was a frame. 


The other lesson in Pen & Ink teaches us to make a transfer by first drawing it on tracing paper, flipping it to the reverse side and tracing it again in pencil, and then transferring it to the watercolor paper and tracing it again with the Sharpie marker. 


I know Hannah is really looking forward to continuing on with the Watercolor course. Harold is greatly anticipating moving on to the the 3D Design, especially because our clay and other supplies arrived the other day. 

Though we weren't a fan of Drawing Part 2, we have really been enjoying the rest of this art course. I do wish she could make it so you could go to the other courses without first having to work through the others. I would also love to see more drawing lessons that were more like the sample on her site. We had spent a lot of time focusing on circles, dots, curved lines, and straight lines, and I would have loved to have incorporated that more. 

You can find Beyond the Stick Figure on Facebook, Instagram, Pinterest, and YouTube.

Don't forget to see what my fellow Crew Mates tught about Beyond the Stick Figure Art School by clicking on the banner below.


Beyond the Stick Figure Complete Drawing Course {Beyond the Stick Figure Art School}

Friday, January 31, 2020

Littles Learning Link Up: Penguin Unit- Lesson 2: Emperor Penguins


Littles Learning Link Up is now on Friday!!

Each month you will find:
  • Posts where I share what I have been up to with my elementary-age children and the preschoolers I work with at our homeschool co-op (including occasional highlight posts where I share how we used ideas that have been linked up here on Littles Learning Link Up).
  • The occasional round up post.
Each week, I will host a link up, where you can share either what you have been up to recently, or old posts that may go with the theme.  Feel free to link up more than one post.

Each week I will continue to feature a couple of posts from those that have been linked up. 

I hope you will continue to share your wonderful posts, and I hope you will find something new to try with your child(ren).

It would be great for everyone to stop by and visit the other linked-up posts as well. Check them out, leave some comments, pin those that interest you. Let's make this a real party and socialize with each other.

Here's a peek at what we have been up to in our homeschool.

In our history lessons we have been learning about Japan and China.  We learned things I don't remember learning, like Japan's great leader, Hideyoshi and the first Tokugawa ruler. Then we looked at how Japan closed it's doors to all other countries except a select few. Then we started learning about China, reading about the Manchu conquest of the Ming Empire. The children have gotten to reenacting with their Lego blocks while I am reading. 

That's really all that is new. The children continue to do their math independently and we try to fit English in.  

Science is definitely being neglected a bit right now, though we have started working on some geography with Let's Go Geography, a new review product. We are skipping around in the program, so we can learn about countries we have focused on in our history reading. So, right now, we are learning about Japan. The children are watching different videos that have been linked and we worked on some map work and the flag. 

Moving on to our preschool lesson:

We have been working on our penguin lesson.

We sing the songs I came up with every week.

Did You Ever See a Penguin (tune of Did You Ever See a Lassie)

Did you ever see a penguin, a penguin, a penguin
did you ever see a penguin waddle around?
Waddle this way and that way, waddle this way and that way
Did you ever see a penguin waddle around?

See the Penguins (tune of Mary Had a Little Lamb)

See the penguins standing there, standing there standing there
See the penguins standing there,
In Antarctica

They would go tobogganing, tobogganing, tobogganing
The would go tobogganing
Down the snowy hill.

Of course I have motions and movements for these like our songs from last year.

We also sang our snowy, winter songs from last winter.

We read the book The Emperor's Egg by Martin Jenkins.


I thought it would be cute to make a penguin out of a toilet paper roll. But, I wanted a bit more. So, I decided to glue it to a paper plate, adding cotton balls for snow. Then I decided to wrap the paper plate up with foil first, to give it an icy feel. I then decided to finish it up with a white pompom on the penguin's feet for an egg. Because you know, Emperor Penguins incubate their eggs on the dad's feet under the flap of skin to keep them toasty warm.


Here are the materials you will need:


Paper plates
Foil to cover the plates
School glue
Construction paper (black, white and orange)
Cotton Balls
Paint brushes
Scissors
Black Paint
Toilet paper rolls
white pompoms (about 1/2 in)
Wiggle eyes

I love having children paint toilet paper rolls. All they have to do is hold it with one hand, sticking most of their fingers inside, and then paint with the other hand.


We set them aside to dry while the children went to snack and gym. When they came back they glued on the white bellies and black flippers.


While they were drying, the children worked on their snowy habitat. I had them start by pulling the cotton balls apart gently, trying not to separate them but keep them in long strands.


Then we glued them onto the foil-covered plate.


We left a section in the middle uncovered and then they glued on the penguins feet.


Then we put a bunch of glue down and glued the toilet roll penguins to it.


Last, we added the wiggle eyes and beak. I'm not sure if this would have been easier to do before gluing the penguin on. I did it afterward so they wouldn't knock it while attaching it to the plate, but then it was difficult to glue them on because they were standing upright.


We set them aside to dry and worked on making a life-sized emperor penguin. I used this opportunity to talk about measurements such as inches and feet.


I had already taped the black paper together and attached it to the wall. Then the children took turns adding different features.


Then the children took turns standing next to it to see who was taller, the child or the penguin. They learned that the penguin was taller than all of them. I then cut pieces of yarn in the children's heights for them to take home.

For our final activity, the children practiced standing with a hard boiled egg balanced on their feet.


Littles Learning Link Up Features

On my last Littles Learning Link Up post, there were 2 wonderful posts linked up. I will be featuring both of them.

Please, don't forget to stop by other posts that are linked up. See what catches your eye, stop by, pin the post to a relevant board, and perhaps leave a comment to let the author of the blog know you have been by for a visit. I know I appreciate others commenting and letting me know they have read my posts, so I am sure others do too.

This week's first featured post is:


Megan from My Full Heart shared ABC Jesus Loves Me: Year 1, Weeks 1 and 2

This week's second featured post is:


Gale from Imaginative Homeschool shared A Kiddo Directed School Day

Join the Party!

I would love to have you join in this week! What sort of activities do you do with your young children? Do you have some favorite activities you would like to share? I invite you to link up below. I will be pinning posts on one of my relevant boards, and I would love to feature some of the activities each week from what is linked up.

Please know I may share a picture from your post and link back to it, along with sharing how we used your idea in our school time. By linking up you are giving me permission to use a picture from your post. I will ALWAYS give credit and link back. Additionally, if you choose to try out any of the ideas with your child, please make sure you give credit where credit is due.

Linky will be open through Monday night, to give me time to check out all the posts and get the Features organized. Please take the time to visit some of the other wonderful posts linked up.

No button currently, and there won't be one until I can figure it out seeing as Photobucket has changed things. Feel free to still share the picture in place of the button. Just link it to my Littles Learning Link Up permalink please.


I am sharing over at

Homeschool Coffee Break

February Homeschool Round UP {Homeschool Collection}

You are invited to the Inlinkz link party!
Click here to enter

Friday, September 24, 2010

School Time: Week 3 (Pp)

We started this week by coloring our Pp pictures.  Our Pp words this week are piano, pig, pumpkin, and pea pod. The words I couldn't find signs for our pepper and penguin, though we made a sign up for penguin the last time we did P. This week the girls had to follow instructions and color each picture a specific color.  I think they did a great job. We still have to glue them to our capital P though.


After they colored them we focused on our shapes and color green collage.  You can see the post about that here.  Tuesday we had our Pizza Party.  We had a pizza party when we did P back in January (it was also Tabitha's birthday party, sort of) and Tabitha really wanted to have another one.  We made invitations last week and took them to playgroup to hand out.  
I cut out circles, colored a smaller red circle to represent the sauce, then colored the inner circle yellow for cheese.  The girls glued on red circle pepperoni, onto which I wrote the party info.


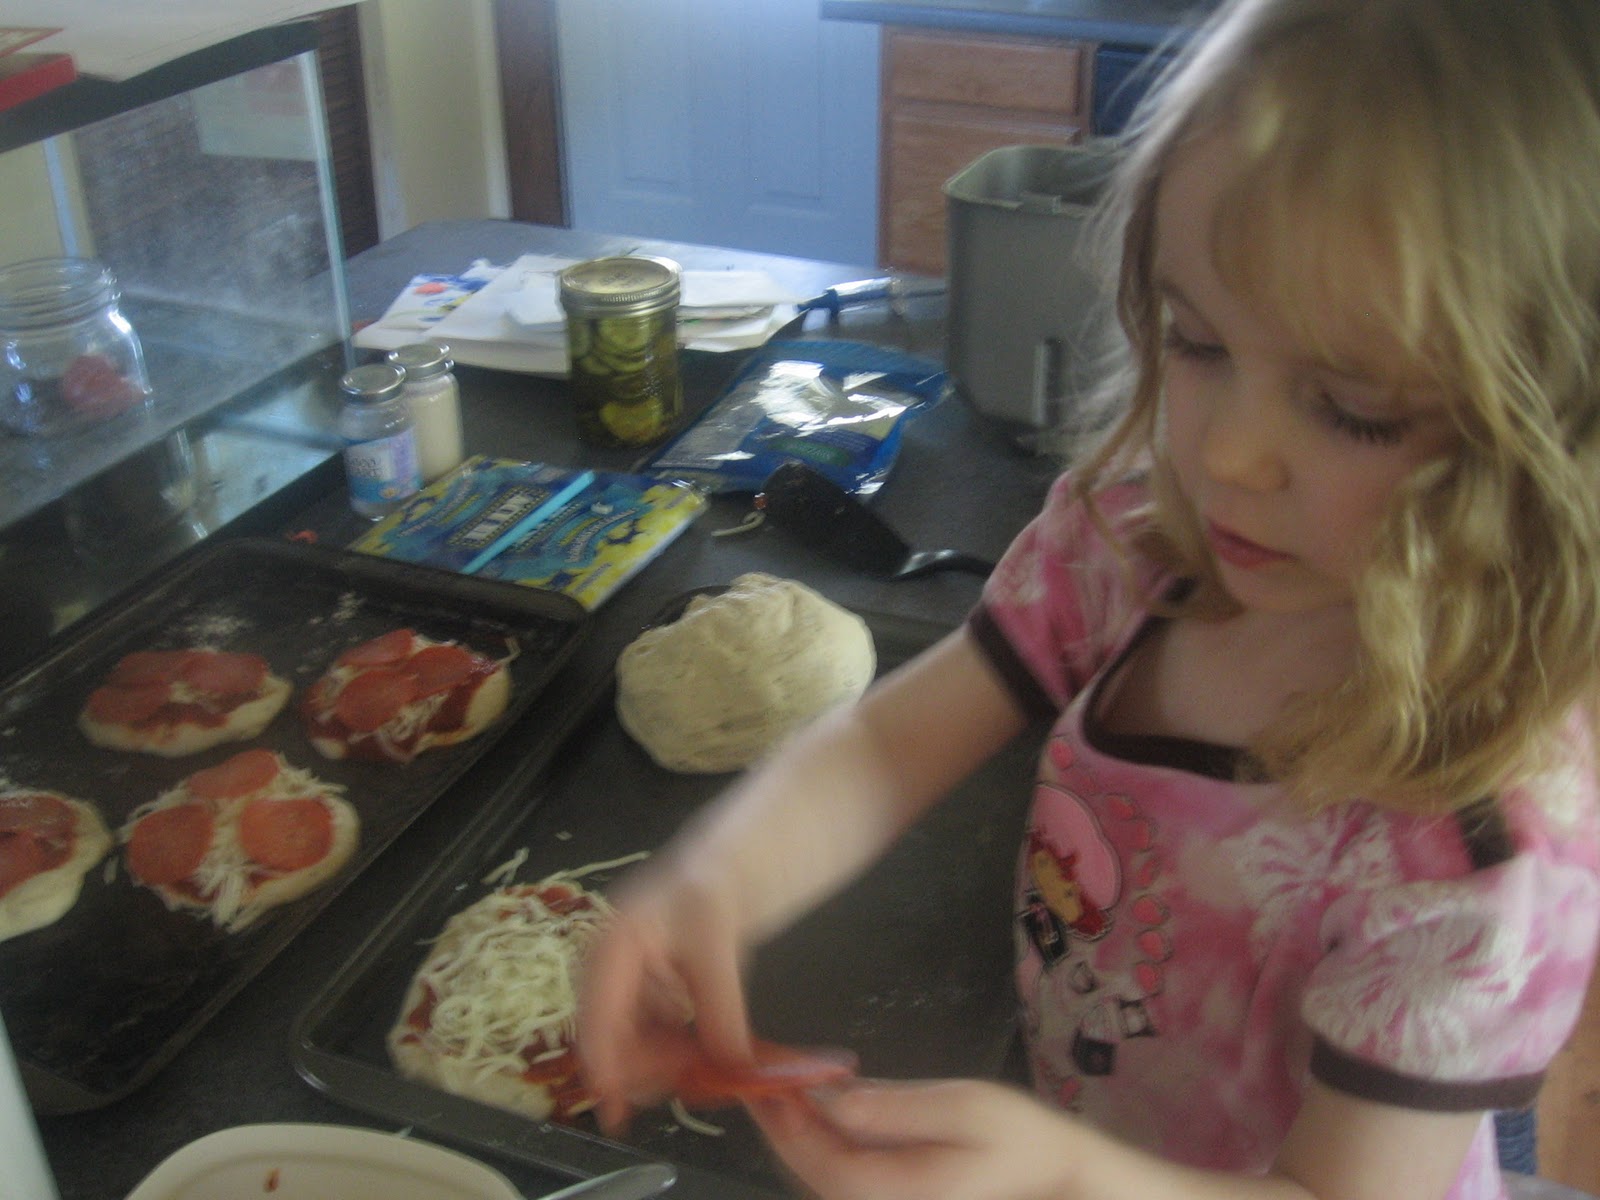
This week play group came to us and the children got to make their very own personal pizzas: 


 Then we had pepperoni pizza, popcorn, pickles and punch. 
Oh and there were peanut butter cookies for dessert.

 Do you remember the pictures I shared in my first post for the school year.  Pictures of how organized the playroom now was.  Well...the children were here for approximately 2-3 hours and after they left the playroom looked like this:


Goes to show it doesn't take very long for a mess to occur. 

 Do you also remember I had shared the before pictures in that same post, so I would never let it look like that again.  So I have been working on cleaning it.  This is how far I got:


It's much easier when things already have been organized and I know where to put them, instead of hunting around for a place to put things..

 Later on Tuesday afternoon, we had a visit from my friend from playgroup.  Seems her daughter wanted Tabitha to go over for a sleep over.  So, I woke Tabitha up from her nap and she was so excited with the prospect of spending more time with her friend.  We gathered her stuff together and I send my three year old on her first sleepover.
Seems all went well and she joined us late the next morning while Amelia and I were working on our projects.  I found a really neat idea over at a new-to-me blog, My Tot Learning Time. She used a larger letter with her daughter and jar lids, but I had these soda bottle lids given to me a while ago, so I used them.  Amelia has gone back to this activity many times since Wednesday.


 Then I decided we would Paint P's Pink and Purple.  They just love painting and I am really trying to do at least one painting project a week.


Yes, she's using 2 brushes.  And there IS pink there she just covered it with purple.

 I pulled out our Add The Toppings to the Pizza activity, changed up a bit from earlier in the year because I found these cute circle magnets at KMart.

Red is pepperoni, green is green pepper, white is mushroom, yellow is yellow pepper and blue is blueberries.
(Tabitha insisted on keeping the blue)


(Amelia got a little creative later on in the week.)

I found some different wallets at the thrift shop recently and decided to put them on the shelf as an activity.  They all have different means of opening and closing (zippers, clasps, snaps).  I also put some pompoms in them.  They prefer carrying them around to put other things in.

If you look really carefully in this picture you can see the nail polish she got painted on her finger nails while she was on her sleep over.  She wouldn't let me take a picture of it.  This is what I got when I asked:


We do prefer no makeup/nail polish on our girls, so I will have to ensure it doesn't happen again.

 Just a picture of the wallets out on the mat.

 And we had a P lunch of course.  We had peanut butter and jelly sandwiches, popcorn, peas and pickles.


Our Bible verse for P is "Praise ye the Lord for it is good to sing praises unto our God." Psalms 147:1
We are reading lots of stories that include Peter this week and the girls enjoy singing 
Peter and John went to pray
They met a lame man on the way
He asked for alms and held out his palms 
and this is what Peter did say,
"Silver and gold have I none
but such as I have give I thee
In the name of Jesus Christ of Nazareth
rise up and walk."
He went walking and leaping and praising God
Walking and leaping and praising God.
In the name of Jesus Christ of Nazareth rise up and walk.

Due to some unforeseen happenings this week, we didn't stick to our schedule and I am extending our P lessons for another week.  I always said P has a lot of things that can be done with it. We will finish up next week.

To see what others are doing with their toddlers and preschoolers head on over to 1+1+1=1, Homeschool Creations  Weird, Unsocialized Homeschoolers 

Tot School

preschool corner


Related Posts with Thumbnails