
I've mentioned numerous times how neat it is to be introduced to new-to-me companies thanks to being on the Homeschool Review Crew. Usually we are discovering new curriculum that help us on our homeschool journey. However, there are also times we have the chance to review fun products, like these Super Beads from Zirrly. Knowing how much my children enjoy building and creating, I figured these would be a welcome addition to our home. And once I realized one of our choices was the Super Beads 3D Car & Truck set, I knew exactly who the recipient of this product would be, especially because little Harold's birthday was close to the date we would be receiving them.

Originally I was going to have the girls make the vehicles to give to him for his birthday. However, when we thought about it further, we decided it made more sense to give him the project in the box so he could help build them. I mean, he loves to build just as much as the girls, so why not? The only reason I had thought of doing it the other way was because these 3D projects are recommended for ages 10 and up as they are trickier to assemble than the 2D ones Zirrly sells. Looking back on it, I am so glad he got to make them with our help, as that is a part of the fun of this product. But, he definitely wouldn't have been able to have made them himself.
He was so excited to get the chance to make his own Super Beads 3D Car & Truck.

Everything we needed to create these innovative craft vehicles was included in the box, except for the water that would be needed for fusing the beads together and some sort of tray to keep the beads organized.
Let's take a look at the kit.

The back of the box gives a bit of information about Super Beads and includes pictures of the contents.

I was intrigued that we were going to get to fuse these together with plain old water. Harold, of course, was excited that he was going to have some new vehicles to play with

We received:
Two puzzle trays
Two templates
Little packages of Super Beads in red, orange, yellow, white, and black
Two packages of wheels and little metal "axles"
White plastic pipes
Green plastic tool
Spray bottle
and an Instruction Manual with step-by-step pictorial directions
We also received corrected instructions via email. While the pictorial directions are correct, there was some misinformation and some details that weren't included on the instruction manual. We were also sent some videos to watch that show how simple it is to create with Super Beads. These videos can be viewed on their website under the Photos tab.
The children were excited to get started.

Harold chose the truck as his first project.
In order to get started we had to place the cardboard template underneath the tray. There are little tabs to attach the holes of the template to, but it didn't really click in or anything, especially because the cardboard was a bit curved.

This was not a huge problem as long as you don't try to move the tray while attaching the beads.
It is simple enough to see where each bead needs to be placed.

Amelia wanted to help Harold with the truck. They took turns placing the beads (which I had sorted into an egg carton) in the puzzle tray.
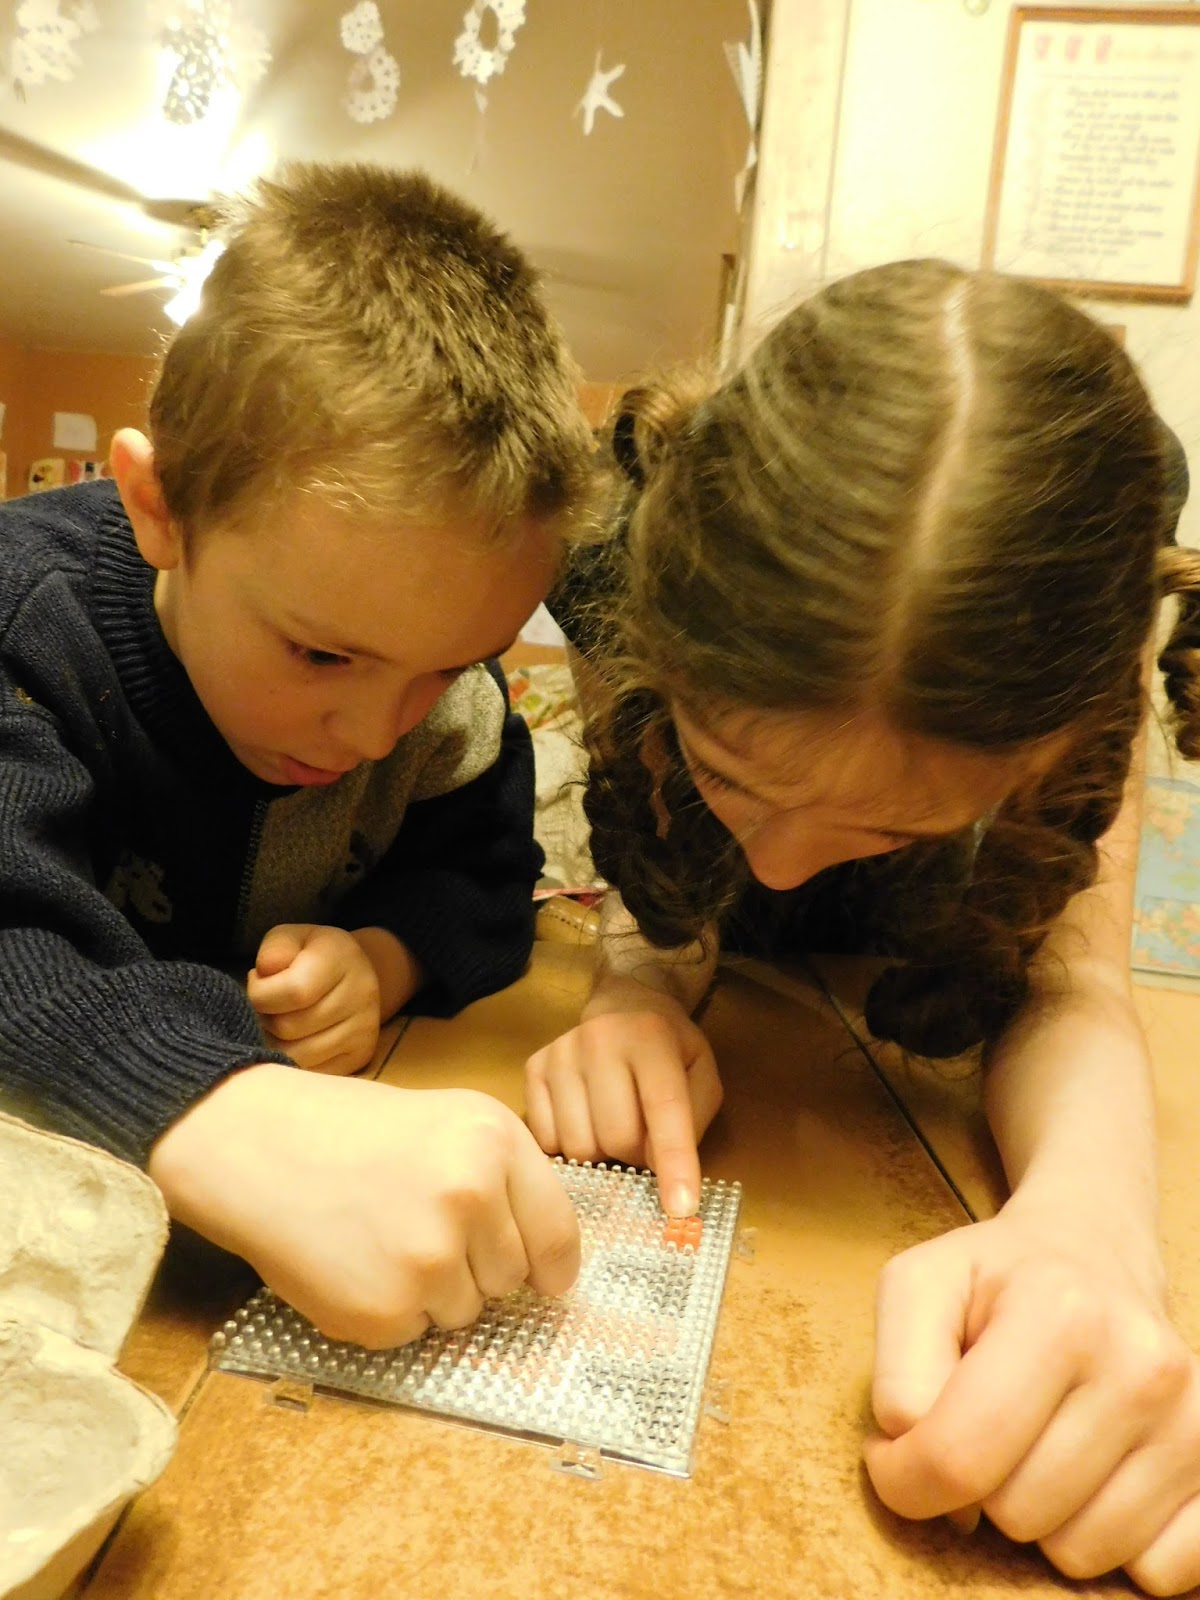
I love that the beads fit snugly and securely on the pegs of the tray. Once they are pushed on, they aren't going to fall off. And if you put a bead in the wrong place or put it on upside down you can use the green tool to pick it back up.

In order for these vehicles to become three-dimensional, they are given shape with the aid of these plastic pipes onto which we had to slide beads.

Hannah joined in, helping with these pipes. Even Harold helped with the pipes for a while. The instruction manual showed us the different patterns that needed to be formed on the pipes.

Here are all the pieces at the end of the first "stage."

The next step is spraying the beads on the tray with water.

We had a bit of difficulty here because we weren't sure exactly how much water to use or how long to let it sit to fuse. The beads need enough water to get them to stick together, but we were warned not to drown them. Also, there were 3 different "setting" times. The instruction manual stated 30 minutes. However, this is one of the details we were informed was incorrect. We were told they had to set 60 minutes in the corrected info. So, we made sure to let them sit while we watched our evening show. Unfortunately, when I went to remove the beads, they started to fall apart. I am not sure if this was due to the time or the amount of water used. In the one video we watched, the little girl mentioned leaving the beads to dry overnight. So, after spraying quite a bit more water on, we headed up to bed, hoping that the beads would be set properly in the morning.

Thankfully this worked. I was able to remove the pieces in the morning, though there were some sections where quite a bit of effort was necessary to pull it up. I was so afraid I might break off some beads and we would have to respray it again. The directions say to use the tool to help remove it; however, after trying to use the tool the previous night and having the beads fall off, I was a bit wary about using it. I found that my fingers worked pretty well.
Here are all the pieces waiting to be assembled.

See how the beads are fused together.

While I worked on the trickier step of assembling the parts, the children got to work on the car.
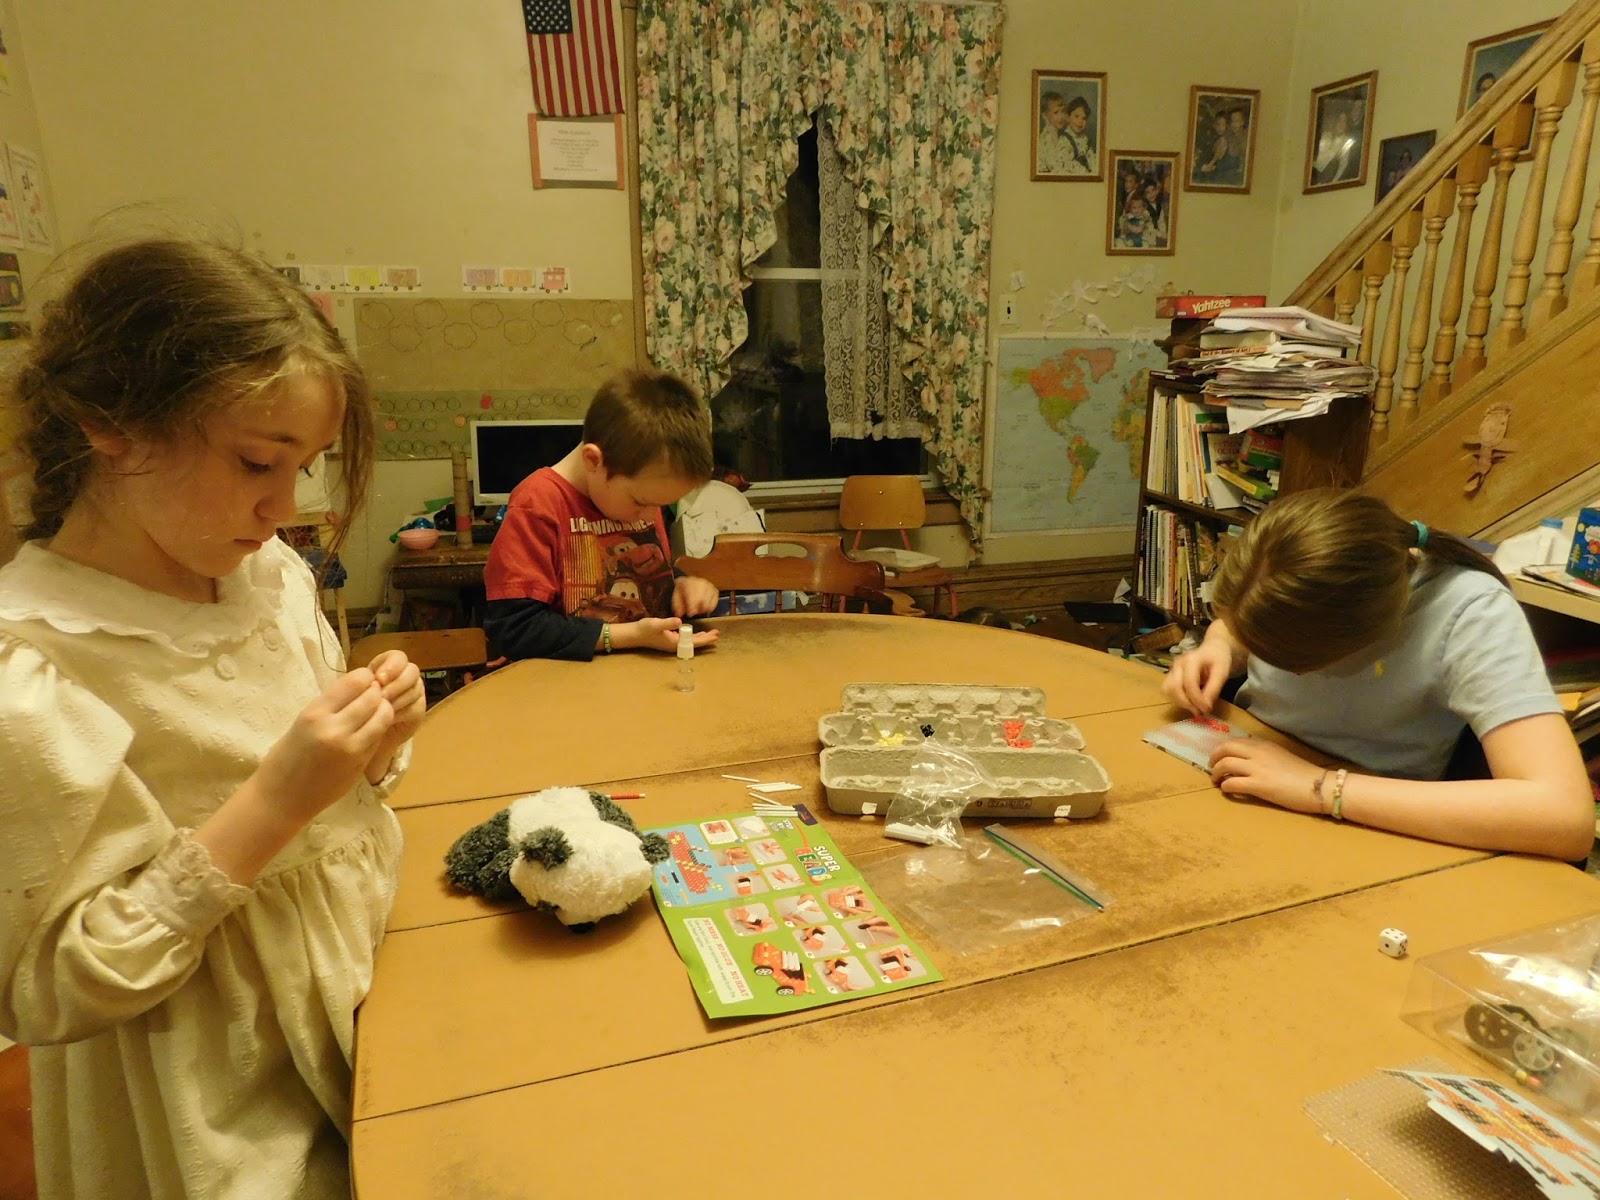
Tabitha worked on placing the beads on the tray, while Harold and Hannah again worked on the pipes.

The first step in assembling the truck was quite easy, though when we had first seen the directions it appeared a bit confusing. However, once you are up to this step, it really does make sense. The diagram on the bottom of the left-hand page shows exactly where each letter pipe needs to be placed in the side of the truck.

Then we came to a bit of a frustrating step. I knew these black pieces needed to be attached to the remaining pipes; however, from the angle of the picture, it was really difficult to know for sure that I was assembling it correctly.

I wish they had assigned letters to each of these pipes and marked it on the diagram as they had for the side of the truck. Thankfully I finally figured it out.

Now those pieces needed to be attached to the side as the rest of the pipes had been.


I have to say, the trickiest part was putting the second side onto the pipes to finish the body of the vehicles.
Here's a look at me putting the car together.

It was quite difficult to get each pipe into the correct hole as other pipes kept falling into the way. I had to detach various pipes numerous times and had an awful time fitting my finger into some of the spaces to get them to go where they needed to go. During this process, I had several beads break off. Fortunately they can be reattached with water. However, some of the more decorative beads couldn't be placed in the exact spot without being placed on the tray. And at this point in the process, it is impossible to use the tray. You may be able to tell from the picture below that a couple of the orange beads that were supposed to be on the roof are no longer there. Later in the process the rollbar and part of the black undercarriage became loose as well. Thankfully they can be fixed by respraying with water.

Now all the truck needed was wheels. I think I ended up using the wrong wheels for each of the vehicles. At first I assumed the larger wheels were for the truck, but they didn't have the same design on the wheel or the same kind of tread on the tire as the ones on the picture. I ended up putting the ones that looked like they were the right kind, though they were the smaller ones. Once I had them attached, they were too tight to get apart to try switching them.

I have a feeling if I had used the correct wheels the car would roll a lot more smoothly than it does now. I can't tell for sure, but I think the axles for each vehicle were a slightly different length. I could be wrong, but it seems like I used the longer one for the truck when it was the car that needed it as it had to go through the entire body of the vehicle, where the truck axle didn't have to go as far as the wheels sit underneath the hood and rear of the vehicle.
Fortunately Harold doesn't seem to mind the missing beads or the incorrect wheels.


Harold and Hannah even made a racetrack for the vehicles, complete with tunnels.


We even had some extra beads, so Harold had a chance to get creative.

I had him make sure to fill in as much of the inner space as possible, and make sure most of the beads were connected at at least two points, as we noticed the beads are much more secure that way.

He loves his little Super Beads Dino, though he wishes it also had wheels.

The pipes are great for allowing 2D creations to stand up!
We had such a fun time putting these projects together, and I am so glad the fun didn't end with the completion of the craft. Harold loves being able to play with his vehicles (and dino).
While I do wish the directions were a bit clearer at times, all in all it was fun to assemble. Additionally, children are able to work on fine motor skills while assembling the projects. Also important to me were the safety aspects of this product. The beads easily fuse together with just water, and they are non-toxic.
If you would like your younger child to be able to work independently, I would definitely recommend looking into the designs that Zirrly sells that are two-dimensional. However, for older children or younger children who have help, these 3D projects are wonderful ways to get those crafty juices flowing. My fellow Crew Mates and I were able to choose from several different products. If you click on the banner below you can see reviews for these additional products:
Jewelry Set and
Don't forget to click on the banner below to see what my fellow Crew Mates thought of the various Zirrly products they reviewed.


![[PREMIO2009.png]](https://blogger.googleusercontent.com/img/b/R29vZ2xl/AVvXsEjXD_Gx-wZ9EM5hXKrEYLksEBkYfRQtmb8VDVTDG_yyLggQoFIstZsh4zszdG20KqErZicRzEhiNYLty7j3IMXJYsABqkXjr8pp-ncj71xCbpxlXGbGpZq2fTuDQqq1RMKV4DPcDBnBViA/s1600/PREMIO2009.png)


No comments:
Post a Comment
Thank you for visiting my blog today. I love to read your comments, so please leave me one if you have the time.
Blessings