Friday, January 15, 2010

Oo Lessons

Well, we started off the week planning on focusing on Oo and we did. We had a very productive week. We got to get a full lesson in on Tuesday as there was no playgroup. And I was able to have lots of learning time today as I didn't need to get finished early as we didn't have care group. And there were no doctor appointments I had to be responsible for driving people to. Plus I have been trying to stay more organized and I am excited about our positive beginning of incorporating some Montessori activities, which I have discussed previously this week. I've pulled myself away from the computer and spent a lot more time with the girls in activities in addition to the "lesson time" and projects.

Now, on to our Oo lessons. Before I forget, it is so cute. Amelia will try to say the short o sound, but every time, before she ends the sound, she ends up saying the long vowel sound. Anyhow, we started the week by making shape books with orange shapes. Each page was devoted to a specific shape (square, triangle, circle and rectangle).


As I had printed out extra pictures accidentally I decided one of our projects could be a letter collage. We haven't done them for every letter, sometimes only as a last resort if I couldn't think of something to do on a particular day, so I figured, "Why not?"

These are the same pictures I use for the word cards and to go in the books.
Found signs for these words: octopus and orange
Made up a sign for ostrich
No signs for Oscar, olives or otter that I could find.

Amelia was so adorable. She saw the picture of the octopus the one morning, before we did our lesson, and she attempted to sign it. Later that day I got pictures of both the girls signing octopus while they colored their octopus picture.

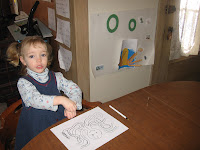
We definitely had a lot of octopus related projects this week. Not only did the girls color a picture of an octopus, we had a poem about an octopus called "Once I Saw an Octopus" which I found while looking for an octopus poem of the same name recommended by letter of the week. I do not think this was the correct poem because, though the poem on the letter of the week website had an author, the website where I found it said the original author was unknown. That's okay, the girls liked the poem that I found at preschooleducation.com. We made a project out of it. I let the girls paint the ocean under the poem:


When the paint was dry I glued on an octopus body I cut out. I put eight pieces of velcro on the bottom of the octopus:


The next couple of mornings I recited the poem and we attached the tentacles.


Here is another octopus activity I found on the blog Counting Coconuts. The writer of that blog actually found it at a different website, but I just drew my own octopus. I figured it went along with the Montessori exercises I introduced this week. They needed to use fine motor skills to put the "o" cereal on the circles drawn on the octopus. Once again I used a shoe box lid as a tray. Tabitha was able to get all the circles covered along with the mouth, eyes and o in octopus. Amelia mainly places them on the paper randomly, though at times she does try to place one on a circle. Unfortunately most times it moves off anyway. Though she does real well with her pincer grasp.


When they are done they are allowed to eat the "TO's" so they really like doing this activity. Maybe I will think of a "P" picture to use this activity with for next week.

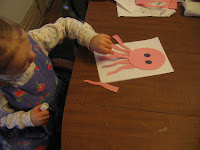
And our last octopus project was made today. We made oval octopuses to put in their O Books. I traced an oval for the body, let the girls glue on oval eyes and then we glued on the tentacles. Unfortunately I didn't get a picture of Amelia making hers as I was holding the bottom of the body out of the way while she glued the tentacles underneath. Tabitha was able to do it independently for the most part.


Our week wasn't all octopuses. I went out and bought oranges and the girls chowed down on them for a snack on Wednesday. Then we cut some into slices to make potpourri. Another activity I found at the Counting Coconuts blog. I cut the oranges into 1/4 inch slices and had the children arrange them on the oven rack I had laid on the dining room table, while the oven heated to 225 degrees.

As you can see, they thought it was snack time still!


Then they sprinkled on the cinnamon. I had to use my Magic Bullet to grind up some cinnamon sticks as we had used almost all our cinnamon up baking Amish Friendship Bread. Didn't come quite as fine as I would have hoped, but it worked. Unfortunately mommy had been distracted by something and when I noticed what Tabitha had done I realized two orange slices had quite a bit of cinnamon on them. But we fixed it. Then I realized that the second step was supposed to be, use a paper towel to blot off excess juice, so I gave them all I nice pat, even though they already had the cinnamon on.


We also made octagons. I cut out white strips of paper and we glued them onto orange paper. I put on a line of white glue and let the girls put the strips on. Funnily enough I had this all cut up and ready to go over the weekend and then I saw something similar on the Counting Coconuts blog. Only difference was, the colors were reversed.

Well, that is it for Oo. we will put pictures in their sound books tomorrow so we can be ready to start Pp on Monday. Looking at the time I guess when you read today I mean Friday and tomorrow means Saturday.

Thursday, January 14, 2010

More Montessori

Well my assessment that Tabitha didn't know she could get the spooning off the shelf was inaccurate. I guess she just doesn't want to do it. Amelia still enjoys being given the spooning to do, though she still prefers to use her hands/fingers. And she will go over to the shelf and play in it. Trying to get her to leave it alone will take a bit of work on my part I am afraid. But I want to be able to leave the work down and get them used to it being there, so I will continue to work on it. Anyway, this morning Tabitha went right over to the second exercise I introduced to her and asked to use it. And this was before breakfast! I demonstrated sorting to her yesterday. For a tray this time I used the top of an 18 count egg container. I used a half of a dozen count egg carton for her to sort into then put 4 each of 6 different color pompoms in a bowl.


She did the sorting exercise 3 times right after I showed it to her. The one time she put one purple pompom in one hole and another purple one in a different hole. When she got to the pink she realized she had no holes left. She actually took the green pompom out of its hole and put the pink in there. Then she realized she had no place to put the green. After looking some more she got it right.

While Tabitha worked on sorting this morning Amelia used the spooning again.

I was so glad today was Thursday! The thrift shop is open Thurs-Sat and the best time to go is, of course, Thursday before all the good deals disappear. And the lady who works on Saturday tends to over charge so we try to avoid going on Saturday. So, I spent $2.25 on a nice assortment of trays for our Montessori work:


Now to decide what to put where. Cause I know the shoe box lids and egg carton lid do not really qualify as beautiful and appealing, which are words Barbara Curtis used in her book to describe the materials that should be used in Montessori exercises to draw the child to them.

Wednesday, January 13, 2010

Starting Montessori

I have been reading the books by Barbara Curtis titled, "Mommy, Teach Me!" and "Mommy, Teach Me to Read!" I actually purchased them a year ago and skimmed through them, then they got put aside. Just recently on a Homeschool.com message board thread I brought up the "Mommy, Teach Me to Read!" book. I decided it was time to start reading it again. So I read both books and decided it was time to organize and plan. I ordered some sandpaper letters from Montessoi Outlet, but I am still waiting for them. So I decided to start introducing the girls to some simple practical life exercises. On Monday I introduced the spooning.


Tabitha showed great concentration, though she hasn't been interested in doing it again. Come to think of it, maybe she thinks she needs to wait for me to give it to her. I will let her know that she is able to get it off the shelf if she wants to do it.


Amelia also enjoyed this and shows great concentration. When I worked at the Montessori we gave the younger children bigger things to spoon, like cotton balls, but she seems to do well with the dried beans. She doesn't quite get the concept of going from left to right. Once she gets some in the right side she tends to go back and forth. And she likes to hold the spoon in her right hand and use her left hand to move the beans. She keeps trying to play with it on the shelf though so it does keep getting moved up, another reason Tabitha may not be using this work. Doing Montessori at home with an almost 3 year old and a 18 month old is sure different than having the age groups separated.

I did struggle for a while on what to use for trays. I want to see if the thrift shop has any decent ones. But for now I am using shoe box lids. Lots of improvising going on here finances the way they are.

Sunday, January 10, 2010

Finished with Nn

Well we finished Nn today. This evening I wanted to get their Nn books put together so we could start fresh tomorrow with the letter Oo. We worked the poster backwards this time. As the pictures were still on the poster I read the word card (having trouble getting Tabitha to look at the words/letters, she preferred to look at my face) and had them find the picture, take it off and then we made sure it matched the picture on the back of the word card. Then we sat down and glued them onto the Nn books. Originally, these books were supposed to be more personalized, with objects from around the house. The problem was, I didn't know how to get the pictures into my Microsoft Works Word Processing program. Now that I do, I may go back to my original idea, but then again if I do that half the alphabet will be different. For now the books are composed of:

The Cover
(Tabitha recently decided she wanted to trace the letter too.)

Our introduction to the letter and its sound

"My name is" "I say 'nnn'"

Our Project and the pictures

This was Amelia's book. Tabitha's pictures end up anywhere on the page she wants as I don't help her. We write the words together (I let them hold the pen then I hold their hand). Amelia fights quite a bit, wants the pen to go off in the direction she wants, so I do end up taking over. I say the word slowly as we write the word.

It seemed to me that Amelia wanted to do some more, so I took two index cards, drew the number nine on each, and we counted 9 dots of glue then added 9 dried beans to the card.

Tabitha kept saying she was tracing the nine with her finger. I did tell her it would be better to wait until the glue was dry!
So now we are ready to start the letter Oo this week.

Saturday, January 9, 2010

Nn Continued

Well, I planned on continuing Nn this week, and we did! On Monday we decorated the number nine with 9 noodles. I have found the white glue since the last time I tried to do a counting lesson, so we had 9 dots of glue visible for the girls to put their noodles on. Before I realized it, even Amelia had her noodles placed on the glue dots. She is loving doing these crafts!


Tuesday was play group, so we didn't have time for a project. But on Wednesday we made neckties for our letter/sound book. I found the idea at the dltk website. I used some scrapbooking paper I have on hand. We used plain colors for the shirt and a coordinating design for the tie. After I had everything cut out and ready we began by drawing a line down the middle and gluing on 5 buttons (Tabitha is obsessed with the number 5).


Then they glued the collars on and the tie with the knot as per the directions at the website.


On days when we didn't have appointments we started by looking at our word cards and putting our pictures on the poster. Usually I will say the word slowly and run my finger under the word. Then I have Tabitha say it fast (something I learned from the book "Teach Your Child to Read in 100 Easy Lessons" by Siegfried Engelmann). I show them the picture and they find the matching picture to hang on the poster. It sure is nice to be back to doing our lessons the "right" way.

And here is the way the poster is supposed to look:

We also read the poem "The Night Will Never Stay" by Eleanor Farjeon, one of the poems suggested at the letter of the week website. We also read "The Best Nest" by P.D. Eastman. Unfortunately our other book didn't arrive in time to really enjoy for the week, though we will still read "The Napping House" by Audrey and Don Wood.

And surprisingly we were able to find nectarines this time of year at our local store to eat for snack. They were a little hard and not so sweet and juicy, but Tabitha, at least, enjoyed them (5 pieces at a time). I cut them into slices, and by the time she was done she had eaten the entire nectarine herself! Amelia got a little ahead of me and started eating before I could get it cut.

Monday, January 4, 2010

Started "N" lessons

At the beginning of last week I was feeling so encouraged. I had prepared our lessons for the letter N. Then we each took turns being sick. So we didn't get to do everything exactly as planned. But, we are continuing "N" this week.
So, on to the lessons/projects that we got done. Though I was feeling blah on Monday Amelia really seemed like she wanted to do something. So after dinner I let her glue shredded brown paper on her nest and then glue on her eggs that she colored blue. I had planned on them painting a tree/branch on some construction paper so we could glue the nest full of eggs to it, but that hasn't happened yet. Tabitha hasn't even had a chance to glue the eggs on as they got misplaced. I believe we will finish this project this week.

Next we dyed noodles. The girls helped count 10 rigatoni noodles into each bag, we did all six colors of the rainbow. Red, orange, yellow, green, blue and purple (ok, we didn't do indigo). In order to dye the noodles I looked on various sites to get the instructions. I found two different options. Use rubbing alcohol or white vinegar. Using the vinegar was suggested to make them safer for the children and to make them edible. I chose to do an experiment. With the girls help we did the vinegar option. Here are the directions:
1) Place noodles in zippy plastic bag. (Lots of practice counting to 10)

2) Add 1 teaspoon of vinegar (or rubbing alcohol)
3) Add 5 drops of food coloring
4) Squish and shake the bag up until the color is evenly distributed and soaking into the noodles.
5) After finished with all the colors you are doing gently dump them onto wax paper (I covered cookie sheets with the wax paper so I could have room on my counter)
6) Let dry.


I did the rubbing alcohol version after the children were busy in the other room.
What I discovered was we prefer the rubbing alcohol. The colors come out much brighter and seem to be "soaked into" the noodles more thoroughly. Also, the vinegar ones became brittle. I can break them with slight pressure between my thumb and index finger. The ones with the rubbing alcohol didn't break with even more pressure. (Though they do break if you step on them! Ooops!)


Left-vinegar/Right-rubbing alcohol
I won't post all the colors, I figured these give the general idea. Of course if you want to use them for cooking you'll want to use the vinegar. But we used them the following day to make noodle necklaces and we really couldn't use ones that were cracked down the side.

Surprisingly, Tabitha did a great job threading the noodles onto yarn. I say surprisingly because we have never done it before. Even Amelia had the idea, she just couldn't get it to go through. I plan to keep practicing with this activity to help the fine motor skills. One little trick I tried was to leave the yarn attached to the skein so it wouldn't fall off the other end as they threaded. It worked really well!


In the above pictures the girls are standing in front of our Nn poster. I usually cut the N's out. I cut them out in green for the poster, white for our alphabet chart and the cover of their letter/sound books and black for inside the sound books. That was one thing I didn't feel was important last week as I was sick.
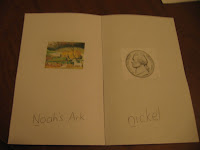
The words I chose to put on cards for this week that I could find sign language signs for are: nurse, nest and nickel. The other words I put on word cards are narwal, numbat, Noah's ark, and newt. We also learned to signs for noodle and necklace. Our verse for this week is :

No man can serve two masters...Ye cannot serve God and mammon. Matthew 6:24


Related Posts with Thumbnails