

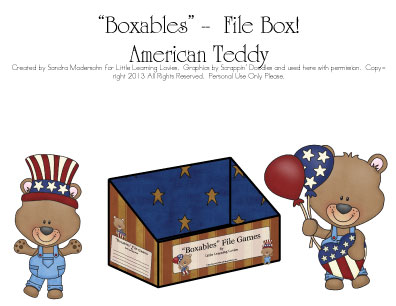
May I introduce you to Boxables, "super sturdy printable boxes that you print out on card stock and assemble in about 20 minutes." "12 - 15 of [their] fun [Boxables] games will fit right in there! Easy to take along when you travel and, best of all, easy for the kids to keep neat!!"
I received the original box to review, but quite a few different designs have been added recently.
Here is the printed, un-assembled box with the instructions in the top right corner. All that was required to put this together was a glue stick and a pair of scissors.

Here are the step-by-step instructions.

Step 1 was to print all the pieces out.

The bottom has three pieces: The outer bottom, the support and the decorative inner sheet. I cut them out and folded the tabs.


Step 3 consisted of cutting out and putting together the front section. This also has a support piece.

It gets folded in half lengthwise and unfolded, then I did the same with the tabs. The tab to the bottom gets glued to the length of the front, then the support piece gets glued in and the remainder of the front is glued down. I had been a little confused at the instructions here because it said we would glue the remainder down in a moment and somehow I skipped where it said to glue it down. This was completely my oversight, no clue how I missed it. It may have been the constant running back and forth to take care of Harold.

The front is now attached to the bottom.

In Step 4 the back is put together in a similar way to the front.

The opposite bottom tab is glued to the back of the back section.

The decorative piece is then glued on top.

And then the decorative tab is folded down and glued.

Quite simple so far, wouldn't you say?
We move on to the sides in Step 5.
I cut out all 4 pieces along with the part designation just in case I needed it. Looking back, I really didn't need to keep the letters as we were told to use the "big" sections first, which would be J and K.

I turned them over and folded the flap to crease it.

They are then glued to the remaining tabs of the bottom section.

It was in here that I got a little confused as to when to glue down the folded tabs of the sides. It's not that the instructions are not clear. I was just expecting to glue them down a little prematurely. They are actually the last thing to get glued down. Once I realized that I understood what I was doing.
Now it is time to bring the sides together. I turned it over to put glue on the tab of the back piece, which is then brought together with the side. Then I did the same with the front tab.


It was a little trickier to get glue on the two remaining tabs as I did not want to ruin the parts that were already glued together.

Here is what the box looks like after all the sides are joined.

The only thing left to do was insert and glue down the side decorative pieces. Of course this is where I messed up a bit. Having to put the glue on and push it down inside sounded simple enough, but you have to make sure it is lined up properly. The bottom should fit snug to the bottom of the box. Then you glue down those tabs (you know, the ones I was concerned about).

I realized after I had the tabs glued down nice and securely, that the one side should have been pushed down just a little bit more. My left side is about 1/4 inch above the right side.
Fortunately, you can't really tell.

The Boxable Storage Box was very easy to assemble as long as you read the directions carefully. I do have to say it took me almost double the time suggested to complete it. I would recommend putting it together with no distractions (i.e. when the children are in bed), I am sure it wouldn't have taken me near as long.
Now it is just waiting for some Boxable Games to fill it with. The games come with their own printable file folder that match the game and fit nicely in the box.
Here are some of the Boxables Games I would love to try.
My favorite Math Games:


My favorite Early Learning Topics:


My favorite Literacy Games:


And my favorite Boxable Box Designs:

There are many more to choose from, just stop by the Little Learning Lovies Store to see for yourself. Both the Boxes and the Games sell for $2.00 a piece, though there are several games right now that are on sale for 50% off, that's just $1.00.
To find out more about the Boxables, you are invited to a Facebook Party for the Launch. It is scheduled for 9:30 pm EST tonight, June 20th. You can RSVP here. I plan to attend, and I hope to see you there.


![[PREMIO2009.png]](https://blogger.googleusercontent.com/img/b/R29vZ2xl/AVvXsEjXD_Gx-wZ9EM5hXKrEYLksEBkYfRQtmb8VDVTDG_yyLggQoFIstZsh4zszdG20KqErZicRzEhiNYLty7j3IMXJYsABqkXjr8pp-ncj71xCbpxlXGbGpZq2fTuDQqq1RMKV4DPcDBnBViA/s1600/PREMIO2009.png)


No comments:
Post a Comment
Thank you for visiting my blog today. I love to read your comments, so please leave me one if you have the time.
Blessings