I had the privilege of reviewing the newest edition of Handwriting Without Tears Kindergarten Curriculum.
I have had concerns about Tabitha's handwriting. She has been writing letters for quite a while now, but she started so young that I was just letting her write them as well as she could. We have tried using other handwriting papers for practice, but there are still letters and numbers she reverses and she is still working on the neatness factor. I thought using Handwriting Without Tears would be a great opportunity, I have seen this handwriting curriculum suggested as part of other homeschool curriculum I have looked into, but I was never sure what was involved.
The authors of Handwriting Without Tears, Jan Z. Olsen, OTR and Emily F. Knapton, M.Ed. OTR/L, believe that "Explicit, multisensory handwriting instruction in kindergarten is crucial." They have created a curriculum that is enjoyable for young children in that there are many opportunities to be moving and singing and playing. Not only are children working on their fine motor skills, but there is a lot of large motor activity going on.
Before a child works on writing the letters and numbers in the workbook with a pencil, they are building letters with wood pieces, writing letters in the air and writing letters on a slate chalkboard. Children are getting involved and having fun, which is a very important part of Handwriting Without Tears. There are many different materials that work together in this curriculum, all of which are not completely mandatory to have, but I felt at a bit of a loss not having some of them. They include:
Before a child works on writing the letters and numbers in the workbook with a pencil, they are building letters with wood pieces, writing letters in the air and writing letters on a slate chalkboard. Children are getting involved and having fun, which is a very important part of Handwriting Without Tears. There are many different materials that work together in this curriculum, all of which are not completely mandatory to have, but I felt at a bit of a loss not having some of them. They include:
- Wood Pieces Set for Capitals
- Rock, Rap, Tap & Learn CD
- Magic C Bunny Puppet
- Slate Chalkboard
- Blackboard with Double Lines
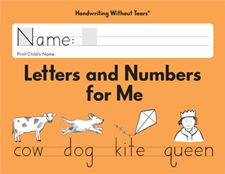
- Letters and Numbers for Me workbook
Handwriting Without Tears also recommends pencils and crayons that are the right size for little hands for when they are ready to use the workbook. They also have small chalk bits and sponge pieces (you will see what those are used for below).
You can find out more about these on their Product page.
You can find out more about these on their Product page.
The curriculum starts with foundational readiness activities. The first 2 weeks of the curriculum are devoted to readiness skills. For example, children are practicing:
- Shaking hands with "Shake Hands With Me," learning social skills and right/left discrimination
- Getting to know their Wood Pieces with "Trade, Polish and Sort Wood Pieces," "Build & Sing Mat Man" and "Capitals on the Mat"
- Left, right, up, down and more with "Positions and Body Parts"
- and so much more.
I actually didn't take the full two weeks to go through these activities as I felt they were for new kindergartners just starting out at the beginning of the year in a school setting. I did want to sample some of the activities to get the girls familiar with the curriculum. We did not have the Wood Pieces, but Handwriting without Tears does have templates for making your own. I chose to make ours out of foam.
The girls got acquainted with the foam pieces by playing with them on the mat.
After Hannah built something that resembled a butterfly, the other girls had to try.
We then learned that there are Big Lines, Little Lines, Big Curves and Little Curves. We did some gross motor activities using the Big Curves, learning "apart," "together," "over," "up," and "down." Then we focused on "vertical," " horizontal," and "diagonal" with the Big and Little Lines. I think these would be great activities to use occasionally to reinforce these concepts with children, having fun in the process.
Another day, the girls and I built Mat Man. We put him together while singing the Mat Man song which is sung to the tune of "The Bear Went Over the Mountain." It starts out, "Mat man has 1 head, 1 head, 1 head, Mat Man has 1 head So that he can think."
We each took turns holding the completed Mat Man's hand.
I have to say, I was once again able to mesh a new product with what we are already doing. Mat Man fit in so perfectly with our Uu:Us unit as we were focusing on how God Made Us Wonderful. We transitioned from building Mat Man to each girl making a Heart Person to decorate for Valentines Day.
After the 2 weeks of Readiness Activities, the focus of the next 8 weeks is capitals, with numbers being included in the first 5 weeks. The week always starts out with a multisensory activity called "Wet-Dry-Try." Using the slate chalkboards the teacher is to follow the capital formation chart to form a letter. The child then uses a wet sponge cube to trace over the letter in the correct formation. They then do the same with a dry paper towel piece, and they conclude by using the chalk to write the letter. As I did not have a slate chalkboard for the girls we used the easel chalkboard. The thing is, this is an activity I have been using with the girls for a couple of years now, so they knew exactly what to do. We do not have sponge cubes, but a small piece of paper towel crumpled up worked fine.
Even Hannah did a pretty good job.
I have added the smiley face to the board as would be found on the slate chalkboard to show the children where to start their letters. I also started drawing a rectangle about the same size as the mat (as I don't know the dimensions of the slate) on the easel so we could have a closer representation, plus it gave the girls the boundaries and the starting corner as are so important with this curriculum.
When we were working on our letter, I would give the girls a mat and the foam pieces needed for that letter. I would write the letter one part at a time on the chalk board and have the girls build along with me, trying to figure out which letter it was. Then they would take turns with Wet-Dry-Try before moving on to the workbook. The next step was tracing the big letter on the page with their finger, then they were able to write several letters. I have to admit, I have been letting the girls share the workbook. Originally I was only going to use it with Tabitha because I didn't think Amelia would be ready for it. I have regretted that decision as Amelia really wanted to be included. Luckily there are two lines for practicing, so Tabitha gets the top line and Amelia gets the bottom.
I really like the way the children are to be writing their capital letters in the gray box. When they start on the left side there is no room for reversals because they have to write the remainder of the letter in the box. It also gives them nice straight lines to follow.
Handwriting Without Tears has ordered the capitals into three different groups:
- Frog Jump Capitals (All of these letters start at the top left corner with a big line down. The children then "frog jump, ribbit" up to the top starting corner to finish the letter.)
- Starting Corner Capitals (All of these letters start at the top left corner. However, they may go down, slant to the right or go across.)
- Center Starting Capitals (These letters either start with the "Magic C" or start at the top center and move down, slanting to the left or straight down)
The capitals section is concluded with a Words for Me page, where the children write their first words, words that they would find on signs so all capital letters are used.
During the first 5 weeks of using the workbook the children will also be learning to write their numbers at the rate of 2 per week. I love the number stories that help the children remember how to form the numbers. The girls seemed to really enjoy the story for 4, "4 starts in the starting corner, 4 makes a Little Line down to the middle, 4 walks across the dark night, 4 jumps to the top and says, 'I did it.' (Big Line down)." I think they enjoyed yelling, "I did it!"
As they progress through the numbers they will be reviewing each previous number as they count and write them at the bottom of the page.
After the capitals are finished we will be moving on to lowercase letters which have been ordered into five different groups.
- Same as Capitals & t (These letters all look the same as their capitals, only smaller. They include t because it is made the same, just crossed lower.)
- Magic c (These are high frequency letters that begin with the magic c.)
- Transition Group (This group contains the remainder of the vowels and letters that are familiar from capitals.)
- Diver Letters ( All these letters start with the same pattern, they dive down, swim up and swim over.)
- Final Group (These letters really don't fit in any other category.)
In Handwriting Without Tears the lowercase letters are first learned on paper with double lines. This has always confused me and I have to admit it is one of the factors that has left me hesitant to try Handwriting Without Tears. You can find a video over on the Handwriting Without Tears Kindergarten Teacher's Guide page that explains why they use the double line paper. As we have not yet reached the lowercase letter section I can not really comment on whether my girls find it easier or not. The authors have recognized that children will need to be familiar with different kinds of paper. When the workbook has word practice the children will be using double lines and also the 3 lines we are most familiar with (upper and lower solid line and dashed middle line). I am curious as to how the girls will react to these different lines as they have been learning with the 3 lines. I would think it would be easier for a child to learn with the double line method if they have had no previous experience. We will wait and see.
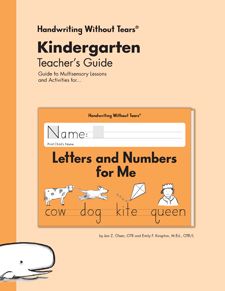
While there are many optional resources that go with this curriculum, the Teacher's Guide really is essential.
The Teacher's Guide is broken into 6 sections.
- The Introduction helps you get to know the curriculum, including the philosophy behind it. It includes the principles of effective curriculum design and the scope & sequence of printing.
- The Foundation Skills section moves into actually working with the children on their readiness skills and posture, paper & pencil skills.
- The Writing Capitals section introduces why Handwriting Without Tears starts with capitals and describes all the hands on activities and teaching strategies before moving into the actual teaching of the letters. Once you move on to the actual teaching you will find instructions, along with a picture of the student workbook page. Here you will find the Lesson Plan for each letter, More to Learn, Support and Connections which can include a video lesson, technology link, or a way to link the letter to other subjects.
- The Lowercase Letters section explains the teaching order and teaching strategies before moving on to the letters. The Lesson Plans are arranged the same as the Capital section.
- The Numbers section also starts with the teaching strategies before moving into the lessons.
- The final section is the Resources section. There are 20 pages of resources! This includes the Teaching Guidelines and a lesson schedule, suggestions for activities to use with the Rock, Rap, Tap & Learn CD, remediation tips, making your own Magic C Bunny, Sentence School, school-to-home connections (not really necessary for homeschoolers), Help Me Write My Name, Kindergarten Handwriting Standards and Common core State Standards.
The best thing about having the Teacher's Guide is that you will have access to the password protected online resources. There are videos of some of the songs which really help in teaching, especially not having the CD. Plus I was able to print out extra practice sheets of the capital letters. Lyrics to the songs and teaching tips and strategies are all there.
There is just so much in the Teacher's Guide! I actually found it quite overwhelming. I would recommend you give yourself enough time to read it through and really get to know it before starting to teach. There are actually things I missed at first and even after several weeks of having the curriculum I am still finding additional things. There is a lot of flipping back and forth, from the lesson schedule, to the Lesson Plan page that corresponds to the workbook, to the multisensory activities to go along with said lesson. It is definitely workable, it is just that it takes a while to get used to it, and I am afraid I am just now getting into the flow.
I did want to mention that I had a very hard time working around the fact that Handwriting Without Tears starts with the Capitals. With my background at the Montessori (having worked there for 5 years) I had it quite ingrained in me that we should start with the lowercase. And just as this curriculum has great reasons for starting with Capitals, there are really great reasons for starting with lowercase. I completely understand what the authors are trying to say. I understand that capital letters all, "start at the top," "are the same height," "occupy the same vertical space," "are easy to recognize and identify," and "are big, bold, and familiar." I understand and respect the philosophy, just as I understand and respect what I was taught when I was working at the Montessori. So, it caused a bit of a conflict for me. Personally, I have been teaching my children both upper and lowercase from the start. In fact, Amelia actually asked the other day when we were going to do lower case.
Concerns aside, this is definitely a great curriculum, especially for hands-on learners and kids that just want to be up and moving.
You can purchase the Handwriting Without Tears Kindergarten Student Book for $8.25 and the Teacher's Guide for $9.25. In addition to the Kindergarten books, you will also find they produce learning tools and books through 5th grade, plus they have a preschool curriculum called "Get Set For School." Additionally, one of their new products is an app for Apple iPad and Android devices with 7 inch (or larger) screens called Wet-Dry-Try. Like the Wet-Dry-Try activity I mentioned above, but using what so many children these days are using, iPads or other devices. As we don't have such devices we did not get a chance to review the app, but many members of the Schoolhouse Review Crew did get to review it.












![[PREMIO2009.png]](https://blogger.googleusercontent.com/img/b/R29vZ2xl/AVvXsEjXD_Gx-wZ9EM5hXKrEYLksEBkYfRQtmb8VDVTDG_yyLggQoFIstZsh4zszdG20KqErZicRzEhiNYLty7j3IMXJYsABqkXjr8pp-ncj71xCbpxlXGbGpZq2fTuDQqq1RMKV4DPcDBnBViA/s1600/PREMIO2009.png)


No comments:
Post a Comment
Thank you for visiting my blog today. I love to read your comments, so please leave me one if you have the time.
Blessings