Tabitha is quite the artist, and I thought she would appreciate the chance to try out an actual art program this year. When I learned that Creating a Masterpiece was coming up for review, I was hesitant at first. I had wanted to try this program out in the past, but we couldn't afford the art materials that were required. I understand that quality supplies are essential, but, they weren't something we could justify purchasing. So, I have to say, I was thrilled when I learned we were going to be reviewing the Drawing Program, because it doesn't have near as many required supplies. And thankfully, Tabitha already had a set of quality colored pencils, so we didn't have to purchase too many supplies to use this program.
We received a one-year subscription to the online Drawing Program which includes four levels: Beginning Drawing plus Levels 1-3. The Beginning Drawing level that we were working in has eight different projects. The number of projects in the other levels ranges from 6-8. There are a total of 30 projects and 48 lessons.
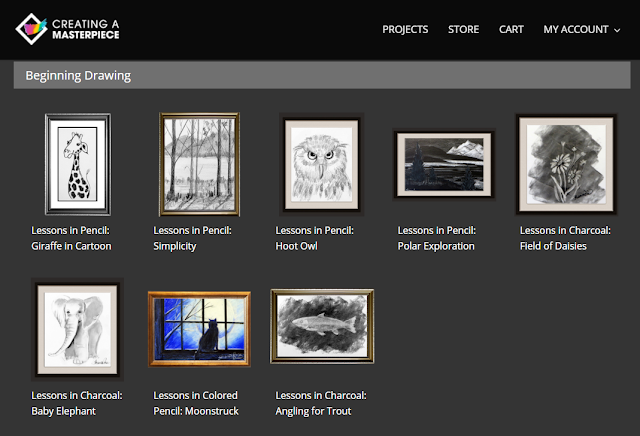
Here are the lessons from the Beginning Drawing level:
When I was first perusing the site and trying to figure out which supplies we would need to purchase, I tried to focus on the simplest projects so we wouldn't have to spend too much money right away. I figured if Tabitha was really enjoying the program, we could purchase additional materials at a later date. So, I was gravitating to what I assumed would be the simplest lessons, such as the Giraffe in Cartoon and the Hoot Owl. Tabitha was very interested in doing the Field of Daisies though, so I decided we could also purchase some charcoal. I think what threw me the most was that there were so many different types of paper that needed to be purchased. I learned that there are reasons for the different types of quality paper.
So, we purchased the needed materials. I love that the instructor, Sharon Hofer, includes not just a supply list, but a link to the supplies at the site she recommends purchasing from. Granted, you aren't required to purchase from them, but it sure made things simpler.
Here's what we ended up buying.
Here's what we ended up buying.
And then we were ready to get started.
To go to a lesson, we just needed to click on the image of the project or the title from the "Beginning Drawing Level" page pictured above. From there we are directed to the informational page for the project.
To go to a lesson, we just needed to click on the image of the project or the title from the "Beginning Drawing Level" page pictured above. From there we are directed to the informational page for the project.
Clicking on supply list will show you what you need, along with a nifty chart that shows how the needs change with multiple children.
Once you have all your supplies lined up, you can click on the lesson link at the bottom of the informational page. Here you will find the following:
- Lesson Videos
- Project Supplies and Downloads
- Supplies Used in this Lesson
- Helpful Tips
- Project Images
- Lesson Highlights
- Student Showcase
Let's take a look at the Lesson Videos, the main part we focused on.
The number of sections varies with the different lessons. For example, the Giraffe in Cartoon only has four sections, but Moonstruck (the project Tabitha started with) has six.
The first video is an introduction to the project and then the remainder are step-by-step lessons with Sharon Hofer teaching. We either see her talking to us, or see her working on her project from above, sort of like we are looking over her shoulder.
She starts out the lesson by introducing herself and the inspiration for the project. Then she lets you know what supplies to use, explaining specific details, like why she uses a specific paper or why she uses a specific size. For example, for the drawing she recommends using a smaller sheet as it is easier.
Here she was sharing a picture of their kitty, the inspiration for the Moonstruck picture.
She then takes us through the project, step-by-step, helping the viewer to make note of details, such as the shapes that are being used.
Here she has worked on drawing the window and moon.
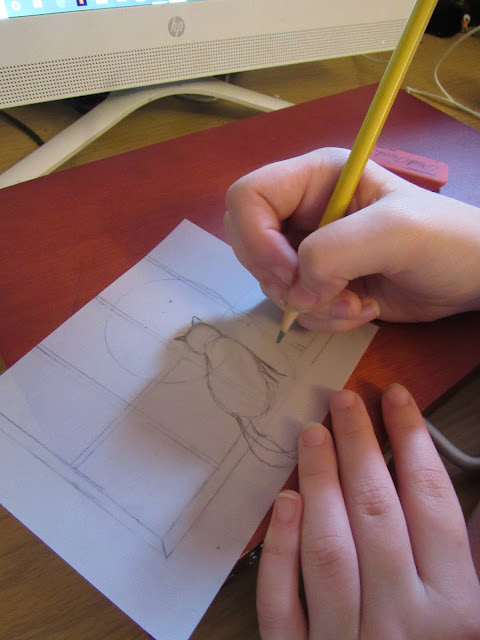
Here's Tabitha working on hers.
The thing is, this was actually our second attempt. Harold wasn't that happy with his first drawing, so I agreed to do it again.
I can't tell which one of mine I like best.
She starts out the lesson by introducing herself and the inspiration for the project. Then she lets you know what supplies to use, explaining specific details, like why she uses a specific paper or why she uses a specific size. For example, for the drawing she recommends using a smaller sheet as it is easier.
Here she was sharing a picture of their kitty, the inspiration for the Moonstruck picture.
Here she has worked on drawing the window and moon.
Then she moved on to the cat. Here we had to pay attention to the egg-shaped body, the circular head and the rectangular leg.
Here's Tabitha working on hers.
Through each 5-10 minute video, the student follows along, sometimes pausing the video to be able to catch up. With Moonstruck, branches were added, then we start coloring in the different sections, creating darker and lighter areas by shading. She also had us using an eraser to make sections almost white again.
Yes, I said we. Though Tabitha was the first one to work on this project, Hannah and I worked on it during our mommy-time. Here are our results.
Tabitha chose to draw her picture twice. Once on the recommended paper and another time in her sketchbook. She actually prefers the way it turned out in her sketchbook (the bottom drawing).
Hannah and I enjoyed working together.
I also spent some mommy-time working with Harold on a drawing. He wanted to make the Giraffe in Cartoon.
Miss Sharon showed us the real-life picture of the giraffe that inspired this project.
She explained how we were going to be exaggerating features to make the giraffe more cartoony.
Harold might have gotten a little carried away with the length of the neck.
He was quite pleased with his drawing.
I think both of ours came out very nicely actually.
The thing is, this was actually our second attempt. Harold wasn't that happy with his first drawing, so I agreed to do it again.
I can't tell which one of mine I like best.
But I do know that it was a lot of fun to do, and it was a great way to get some one-on-one time.
I also love that Harold was inspired to try his hand at making a dog picture he found into a cartoon.
So, as you can see, even though I asked to review this program with Tabitha in mind, she wasn't the only one using it. In fact, I even got Amelia to try it out. Tabitha and Amelia decided to work on Simplicity. I think they both came out very nicely.
I love how each person is able to have their own style come through, even while following a step-by-step lesson.
Of course, I did mention that Tabitha had wanted to do the Field of Daisies, which is why I purchased charcoal. And yes, yes she did. In fact, she drew two masterpieces, again using two types of paper.
The one problem we had with this project is that the charcoal kept rubbing off because we didn't have anything to seal it with. Though she mentions using a sealant in the video, it wasn't listed on the supply list, or we would have gotten some before starting. I think that is one thing I wish she would change. It would be awesome if everything needed was actually on the list. I realize it isn't a huge issue, and really that is the only time we've noticed this so far.
The other thing some of the children and I had an issue with was when she would draw a section, and then decide she wanted to move it over a bit or change the shape. I understand that she is showing the flexibility of drawing, and how easy it was to erase, especially when we were working on the vellum paper. However, I am not one who likes to do a lot of erasing even then. So, I did keep my picture the way I originally drew it, and was quite happy with it.
We are enjoying these art lessons very much and are very thankful we were able to review the Drawing Program from Creating a Masterpiece. Miss Sharon is very easy to follow, and she explains what she is doing at each step in a very understandable manner. So, even though I originally thought it was Tabitha who was going to be using the program, I was pleased to see that even the younger children were able to join in. In our family, the art students ranged in age from 7 to 40-something. So, I would have to say, this is appropriate for a wide range of people. Even Amelia, who always complains that she can't draw, did a wonderful job on simplicity.
I'm so glad we have a year to work our way through all four levels of the program. I'm sure our art skills are all going to improve.
I'm so glad we have a year to work our way through all four levels of the program. I'm sure our art skills are all going to improve.
You can find Creating a Masterpiece on Facebook.
Don't forget to click on the banner below to see what my fellow Crew Mates thought of this art program.


![[PREMIO2009.png]](https://blogger.googleusercontent.com/img/b/R29vZ2xl/AVvXsEjXD_Gx-wZ9EM5hXKrEYLksEBkYfRQtmb8VDVTDG_yyLggQoFIstZsh4zszdG20KqErZicRzEhiNYLty7j3IMXJYsABqkXjr8pp-ncj71xCbpxlXGbGpZq2fTuDQqq1RMKV4DPcDBnBViA/s1600/PREMIO2009.png)


No comments:
Post a Comment
Thank you for visiting my blog today. I love to read your comments, so please leave me one if you have the time.
Blessings