Monday, January 4, 2010

Started "N" lessons

At the beginning of last week I was feeling so encouraged. I had prepared our lessons for the letter N. Then we each took turns being sick. So we didn't get to do everything exactly as planned. But, we are continuing "N" this week.
So, on to the lessons/projects that we got done. Though I was feeling blah on Monday Amelia really seemed like she wanted to do something. So after dinner I let her glue shredded brown paper on her nest and then glue on her eggs that she colored blue. I had planned on them painting a tree/branch on some construction paper so we could glue the nest full of eggs to it, but that hasn't happened yet. Tabitha hasn't even had a chance to glue the eggs on as they got misplaced. I believe we will finish this project this week.

Next we dyed noodles. The girls helped count 10 rigatoni noodles into each bag, we did all six colors of the rainbow. Red, orange, yellow, green, blue and purple (ok, we didn't do indigo). In order to dye the noodles I looked on various sites to get the instructions. I found two different options. Use rubbing alcohol or white vinegar. Using the vinegar was suggested to make them safer for the children and to make them edible. I chose to do an experiment. With the girls help we did the vinegar option. Here are the directions:
1) Place noodles in zippy plastic bag. (Lots of practice counting to 10)

2) Add 1 teaspoon of vinegar (or rubbing alcohol)
3) Add 5 drops of food coloring
4) Squish and shake the bag up until the color is evenly distributed and soaking into the noodles.
5) After finished with all the colors you are doing gently dump them onto wax paper (I covered cookie sheets with the wax paper so I could have room on my counter)
6) Let dry.


I did the rubbing alcohol version after the children were busy in the other room.
What I discovered was we prefer the rubbing alcohol. The colors come out much brighter and seem to be "soaked into" the noodles more thoroughly. Also, the vinegar ones became brittle. I can break them with slight pressure between my thumb and index finger. The ones with the rubbing alcohol didn't break with even more pressure. (Though they do break if you step on them! Ooops!)


Left-vinegar/Right-rubbing alcohol
I won't post all the colors, I figured these give the general idea. Of course if you want to use them for cooking you'll want to use the vinegar. But we used them the following day to make noodle necklaces and we really couldn't use ones that were cracked down the side.

Surprisingly, Tabitha did a great job threading the noodles onto yarn. I say surprisingly because we have never done it before. Even Amelia had the idea, she just couldn't get it to go through. I plan to keep practicing with this activity to help the fine motor skills. One little trick I tried was to leave the yarn attached to the skein so it wouldn't fall off the other end as they threaded. It worked really well!


In the above pictures the girls are standing in front of our Nn poster. I usually cut the N's out. I cut them out in green for the poster, white for our alphabet chart and the cover of their letter/sound books and black for inside the sound books. That was one thing I didn't feel was important last week as I was sick.
The words I chose to put on cards for this week that I could find sign language signs for are: nurse, nest and nickel. The other words I put on word cards are narwal, numbat, Noah's ark, and newt. We also learned to signs for noodle and necklace. Our verse for this week is :

No man can serve two masters...Ye cannot serve God and mammon. Matthew 6:24


Saturday, December 26, 2009

Our M lessons continue

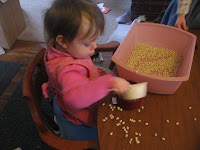
Since the last time I posted we have continued our M lessons. We did more measuring. This time we measured dry beans with the measuring cups. I tried to show them how we needed to fill the 1/2 cup 2 times to fill the 1 cup and so forth. Not sure if anything stuck with them or not, but the foundation will be there. We do talk about measurements and fractions while we bake too. So there was plenty of that going on right before Christmas. Here are some pictures of them playing in the beans:


We also read "Goodnight Moon" by Margaret Wise Brown. I took an idea out of the Dec/Jan issue of The Mailbox magazine that I borrowed from the library. It is actually a scaled down version as the magazine instructions required a full size cupcake paper for the moon and I only had mini ones. So I cut the paper in half. We used star stickers instead of glitter for the stars. One, it wasn't as messy, two, we have no glitter. I haven't had glitter in the house for years. The girls both did a great job gluing the window frame in place. My one addition to make this unique was to add curtains. I just happened to have old scraps of material in my craft tub, sooooo...


Staying on the moon theme, and once again trying to get some science in, we made "Phases of the Moon" books. I found templates at the DLTK website, the same website I get my letter templates from. I didn't use their idea to paint the moon as I didn't want a mess. After I cut out the moon phases (cutting two each for each girl so they could do the waxing and waning of the moon) I let them color them with yellow and gray crayons to give the moon a look of texture. We also used a black circle for the new moon. Then we glued them to black paper (I cut the construction paper in half) and I stapled them together after making sure I had the phases in the correct order.


On the way to church for our Christmas Eve Candle Light service, Tabitha was looking out the car window and told us she saw the crescent moon. Granted it was closer to the first quarter, but I thought that was pretty good. I hope to be able to take the girls outside when the weather is warmer and continue our lesson on the moon. Figure we can take pictures of each phase or glue little squares of paper, with the moon phases drawn on them, on the calendar.

Another idea I got out of The Mailbox magazine was for "If You Give a Moose a Muffin." We had been reading this book and I decided the craft for in their M alphabet book could be this muffin idea I saw in the magazine. They had a pattern for the muffin, which I had to draw free hand anyhow because the size of their muffin wouldn't fit in our book. Then I had to cut out blue dots for blueberries as we had no blue paint to make the blueberry swirl ones that were in the magazine. I used a brown lunch bag to cut the muffin out of because I can not find brown construction paper anywhere. (Hey, if anyone knows where to find some could you please share, none of the packs I see have brown in them, which makes no sense to me as brown is a needed color.)

Saturday, December 12, 2009

Letter M

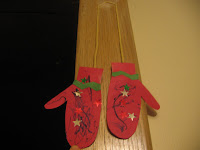
We have been working on the letter M for a little over a week now. I have managed to incorporate art (crafts) and letter/sound as usual. We also snuck in a little math and science. We started out by making mittens. I traced around each girl's hand in a mitten shape so it would be her size mitten. Then, after I cut them out the girls were able to color them and add star stickers. I also cut out zig zag shapes for the cuffs.


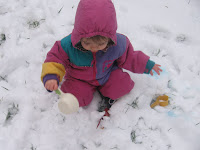
I have read part of the book, "The Missing Mitten Mystery" by Steven Kellogg to Amelia. It's a cute little book. I was actually looking for "The Mitten" by Jan Brett when I found it. Unfortunately our library didn't have "The Mitten" so I had to put it on hold from interlibrary loan. That's okay, they got a chance to wear mittens this week as it decided to snow on Wednesday and we got to go out and play. I let them use measuring cups in the snow, as we have been talking about measuring (math) and we took some inside in the cups when we were all done so we could see what would happen to the snow when it got warm, it melts (science).


We actually started talking about measuring on Monday. The girls enjoy playing with the measuring tape (mainly because they like to pull it out and have it go back in). However, on Monday, we measured different objects, like paper, with the measuring tape and a ruler. We also measured a couple of their baby dolls. There were a couple of purposes to this. One, we got to see that their babies were a little bit bigger than the baby in mommy's uterus is right now. Two, we wanted to discuss how big a baby was when it was born so we could discuss baby Jesus and how big the manger (also an M word) would have had to be to hold him. We added a manger picture to their letter books that we do for each letter (will have to share those in a separate post. We were actually doing these before I started the letter of the week with Tabitha).


Later in the week we actually made mangers. I cut out a manger shape (just a trapezoid) with legs. Then I cut a baby shape out of felt and a square of white material. The girls got to wrap their baby Jesus up in the swaddling cloth. I stapled it so it would stay put. Then we glued it to the manger and glued on bits of yellow yarn for hay.


Today I printed out pictures of a menorah and the girls colored them. We will be putting a flame on the candles every night of Hanukkah. We discussed that Jesus would have celebrated Hanukkah. And yesterday I was looking up recipes for latkes and listening to Jewish Hanukkah music online.


Speaking of music, we have also been listening to a CD of music Mozart composed; we found it at the library of course. When I ask if they want to listen to music and dance Tabitha has actually been requesting the Mozart over Raffi.

Plans for next week include reading the books "Goodnight Moon" and "If You Give a Moose a Muffin." I have some ideas for activities, but I will wait to see where each day leads us.

Saturday, December 5, 2009

Wellll.... I thought I was done with our letter L unit, but I forgot we hadn't taken time to make the fresh squeezed lemonade. So, we took the time to make some before lunch today. I found a recipe for "Perfect Lemonade" here. Her secret is to heat sugar with an equal amount of water to dissolve the sugar so you don't end up with sugar down the bottom of your pitcher.
The girls took turns helping juice the lemons and stir.


I took a video of them drinking it, so I could record any interesting reactions. They both liked it and drank it down. Unfortunately, I can't as it will bother my stomach, so I had a little swallow and yes, it was really good.

Friday, December 4, 2009

Ladybug Lapbook

Because of doctor/dentist appointments it had taken us 3 weeks to do our L unit. We finally finished our ladybug lapbooks a couple of days ago!!
This is the first complete lapbook we have ever done. We started a monkey lapbook quite a while ago, before we took off for the summer, but I am not sure where it is or how to complete it. As we are on M now, perhaps it would be a good time to finish it. But with Christmas projects it may not happen.
Anyhow, as usual, some ideas are my own and of course I got some good ideas from other websites, some which were linked to on other blogs. Seems a ladybug lapbook is a popular idea. So, it wasn't original, but we had fun and we also enjoyed several ladybug books from the library. One of the books my daughters enjoyed was "Lara Ladybug" by Christine Florie. We also read "The Grouchy Ladybug" by Eric Carle, "Lucky Ladybugs" by Gladys Plemon Conklin and "Ten Little Ladybugs" by Melanie Gerth.


We made thumb print ladybugs on the outside. Our Itsy Bitsy letter L book was found through a link at preschool2prek.blogspot.com. The website is kidzone.ws. The Parts of a Ladybug matchbook was also linked at the preschool2prek blog. It comes from Homeschool Share.

I loved the idea of doing a life-cycle wheel for the ladybug. I decided to look for a life-cycle picture. I found one I liked at everything-ladybug.com. I printed it out and used a bowl to cut out around it. Then I cut the same size circle out of red construction paper and cut out the wedge window. The girls glued on dots and the head and drew a line down the middle. After I attached the paper fastener Tabitha loved turning the wheel and learning about the different stages. She is quite intrigued by the pupa stage and she loves to tell us that the ladybug comes out yellow (something new mommy learned). And she spins the ladybug telling us all about the mommy and daddy ladybug coming together and the mommy laying eggs, then the baby comes out. Larva is the one stage she can't seem to remember the name for.
Then taking a different path than any other ladybug lapbook I had seen, I printed out a human lifecycle picture and we glued pictures of our family in the correct stage. As I am pregnant we got to put a picture of the baby near the fetus stage. Then I used the girls' own baby picture and recent picture. I used big brother and sister for adolescents and mommy and daddy for adults. And of course grandma for old age (she might not find that amusing, but she is the closest we have).


And last but not least after counting ladybugs in the "Ten Little Ladybugs" book I decided it would be fun to do something with counting ladybugs in the lapbook. I printed out some ladybugs from Homeschool Share, though I couldn't understand what the instructions said to do with them. I decided to cut out blades of grass and do some one to one counting as we have done in the past. I put the number on the top of the grass blade and then the corresponding quantity of ladybugs was glued on. Unfortunately I couldn't find my white glue and had to use glue sticks. I like the liquid glue for these activities so they can clearly see the amount of glue dots that correspond to the number.


And that is finally the end of our L lesson and our ladybug lapbook. Now we are focusing on the letter M and Christmas.


Saturday, November 28, 2009

Thanksgiving Crafts for Toddlers and Preschoolers

I realize Thanksgiving is over, but I wanted to share our Thanksgiving crafts. I was not very creative, so I found my ideas at other websites. Unfortunately, we didn't get all our crafts completed. I was going to make them pilgrim girl hats to wear, but Tabitha didn't want one and I ran out of time being busy with Thanksgiving dinner, so I just gave it up. Why make it if she won't wear it? Here is the link where I found the pattern.


Our letter of the week is "M" so I started the week by talking about the Mayflower and the people who sailed over on it, the pilgrims. We colored a picture of the Mayflower, nothing spectacular, just a picture I found through searching Google. Later on in the week we started a Mayflower project, but once again it was one that didn't get completed. Found the idea here. We painted paper plates brown and blue. Boy was that an adventure: messy, messy, messy adventure. Here it is put together partially.


I also printed out Bible memory verses and a cornucopia of blessings from the same website, christianpreschoolprintables.com. Here the girls are working on their cornucopias. Tabitha did such a thorough job with her coloring.


I've always enjoyed making hand turkeys, you know trace your hand and the thumb is the turkey's head and the fingers are the turkey's tail feathers. I found a really cool alternative at thanksgiving.123holiday.net. I traced the girls' hands and then we drew on an eye and glued on a beak and a gobbler (or whatever the red thing hanging over the beak is called, I have always called it a gobbler). Then we took a drop of paint on each finger (one at a time) and used a paintbrush to spread in around. We sprinkled 4 different spices on the fingers. I used cinnamon, nutmeg, garlic and pepper. It smells really good.


Amelia was really into gluing the one day. So I printed out an outline of a turkey and ripped some yellow, red and orange construction paper up into some little rectangles and let them glue them to the turkey tail feathers.


I guess I should have started teaching them about Thanksgiving the week before so we would have had time to do all the activities I had planned. But we were trying to finish our ladybug lapbooks, which are still not quite done. In addition we have had way too many doctor/dentist appointments the last few weeks. Makes it hard to get things done. We did do our turkey countdown chart though. I can't remember where I found the idea, but I cut out a turkey body from brown construction paper and glued on a head (it needed a tab behind it to keep it from flopping down). Then I added 5 tail feathers so we could count down the days each morning. I like doing a countdown of only 5 days with them at this age. I had done the same thing with a football countdown chart when we were getting ready to go to the games. I figured that is far enough ahead for a 2 and 1 year old to anticipate. Each morning we took a feather off and thought of something we were thankful for. I wrote it down and we prayed. It was cute, the first thing Tabitha came up with that she was thankful for was her sister Amelia.


Now we can concentrate on finishing our ladybug lapbook (hopefully tomorrow) and working on the letter M. And of course getting ready for Christmas.
Related Posts with Thumbnails